Working with Other Development Environments
In the preceding sections, you've explored the tools that are available as part of Sun's J2ME platform. However, I'm sure you're wondering how to get all this working in that slick little IDE you use every day. The good news is that most IDEs provide direct integration to make MIDlet development a pretty painless experience.
The following sections include details on integrating J2ME with some of the more popular IDEs. If your particular IDE isn't included below, I recommend reviewing the company's Web site for details on any integration tools they might have available.
JBuilder
JBuilder from Borland/Inprise (I'm not sure even they know who they are) is one of the most popular Java IDEs on the market. If you're already a JBuilder user, you'll be pleased to know that Borland has an OpenTool extension named MobileSet, which provides some good J2ME development integration.
NOTE
Tip
If you're not already running JBuilder and you want to download a trial version, I recommend steering clear of the Personal edition. It has too many limitationssuch as not being able to switch between different JDKsto make it a practical development solution for J2ME.
You can download the JBuilder MobileSet extension and install it into your JBuilder IDE. Check the Borland Web site for the latest details on compatibility with your version of JBuilder.
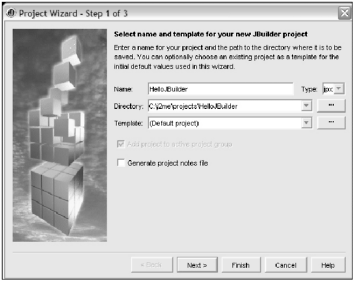
After you have installed the extension, you can create a J2ME project using the New Project Wizard. The first step is to specify the setting for the new project. In Figure 4.15, I've created a new project called HelloJBuilder.
Figure 4.15. The JBuilder project wizard with settings for our HelloJBuilder project.
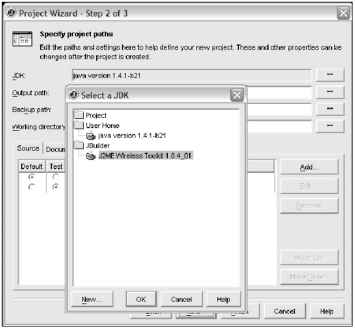
The next step is where the JBuilder MobileSet kicks in. As you can see in the second Wizard step (shown in Figure 4.16), you need to specify that this project will use the J2ME JDK rather than the default J2SE JDK. If you don't see this option, you should check to make sure you have installed the MobileSet into JBuilder correctly.
Figure 4.16. Selecting the location of the Mobile Set JDK using JBuilder.
NOTE
Tip
If required, you can set the JDK location to the MobileSet JDK manually using the Configure JDK option in the Tools menu.
After you have completed the New Project Wizard, JBuilder will create a project space for your new masterpiece. That's about as far as it goes, though.
The next step is to create a MIDlet for the project. To do this, use the New command (typically Ctrl+N or File, New from the menu) to bring up the Object Gallery. With the MobileSet installed, you will notice a new panel named Micro at the end. From this panel, you can create both new MIDlets and new Displayable objects (see Figure 4.17). For your project, you need to start with a new MIDlet. This will bring up the New MIDlet Wizard, which contains a host of options relating to the type of MIDlet you want to create. Don't worry too much about the details of the steps at the moment; these options will become relevant in later sections.
Figure 4.17. Select the MIDlet from the Object Gallery to create a new one.
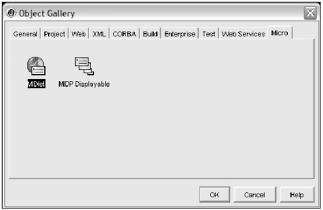
Upon completion, this Wizard will create two new Java source files, a MIDlet (similar to what you've seen before), and a new MIDP Displayable. If you take a look at the MIDlet source, you'll notice that instead of just instantiating a Form object like the one you used in previous projects, the JBuilder creates a class that extends from the class Form ready for you to customize. You'll learn more about this in later sections.
Now comes the really nice thing about an integrated development environmentjust hit the big green Go button. (Okay, it looks more like a Play button.) JBuilder will build, compile, preverify, make the JAD, do your dishes, clean your car, and finally start the emulator running with your MIDlet. How easy is that?
After you've closed the emulator, take a look at the output in the JBuilder Message View. You'll notice that JBuilder is actually just calling the emulator on the command line. This is true for pretty much all J2ME IDE integrations; they automate calling the Sun Toolkit commands. With a good understanding of these tools, you don't really need to use an integration tool such as the MobileSet. For what's its worth, though, it sure makes it easy to get started.
Sun ONE Studio
Sun provides a nice integrated development environment for Java known as Sun ONE Studio, Mobile Edition. The great thing is that this is available free of charge from the Sun Web site, and it's not an evaluation or community editionit's a full-featured IDE with some excellent extensions for J2ME development (and it doesn't hurt that it's from the makers of J2ME).
Along with all the features you'd expect in a Java IDE, the Mobile Edition adds a good level of integration with J2ME tools. This includes the expected code completion, JAR and JAD management, automated preverification and MIDlet debugging, and an excellent facility for integrating other emulators into the IDE through Sun's Unified Emulator Interface.
As with JBuilder, I want to walk through the process to get a MIDlet working quickly. First you need to download the appropriate files from the Sun Web site, at http://www.sun.com/software/sundev/jde/studio_me/.
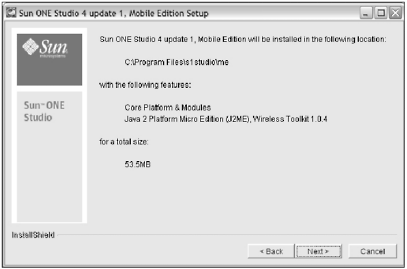
After you download the files, install the package using appropriate settings for your environment (see Figure 4.18).
Figure 4.18. The Sun ONE Studio installation program.
Once you have Sun ONE Studio installed, start the IDE application and choose New from the startup options. You'll see the New Wizard window, shown in Figure 4.19.
Figure 4.19. The New Wizard lets you specify the type of object you want to create.
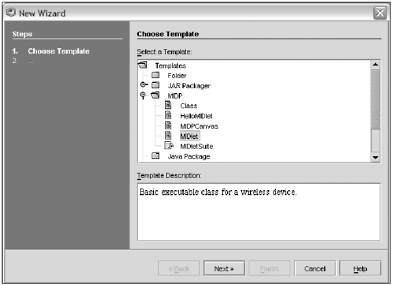
The Studio's New Wizard provides many templates for creating new resources. In this case, use the New MIDlet Wizard to whip up a MIDlet framework. Select MIDlet and hit Next.
The next step is to select a location for the new project. I recommend just sticking with the defaults for your first project.
When the Wizard has finished, you'll find it has created a basic MIDlet, including the application lifecycle code. At this point, you just hit the Play button on the application toolbar. The IDE will compile, preverify, and execute the new MIDlet in the emulator. However, if you didn't bother to adjust the MIDlet code created by the Wizard, your MIDlet will be about as exciting as a Romanian puppet maker's, Secrets of the Master Pup pet Stuffers, Volume I even if the new edition does have details on PuppetStuffer 6.1!
The IDE output from running your MIDlet is far more interesting; as you can see in Figure 4.20, it includes a good amount of detail on what your MIDlet did.
Figure 4.20. The output from executing a MIDlet in Sun ONE Studio.
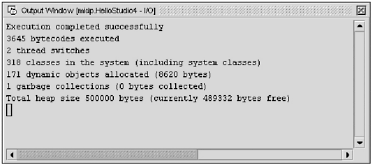
Feel free to play around with both the code and the other options available in Sun ONE Studio 4. It's a powerful and convenient IDE, especially given the price.
Other IDEs
JBuilder and Sun ONE are certainly not the only IDEs out there. The last time I looked, there were more than 30 popular development environmentsall with an excellent range of featuresso there's no shortage of Java development tools. However, there are two other IDEs I'd like to mention before you move on: Eclipse (available at http://www.eclipse.org) and IDEA (available at http://www.intellij.com).
Both Eclipse and IDEA are excellent IDEsIDEA is especially goodand both provide an extensive set of tools for developing in many languages, including Java. Most important, both have excellent support for ANT (an open source tool used to automate the building of Java applications)which I'll talk about in later chaptersin order to manage a good J2ME build system, and both have good community tools available to assist with J2ME development. Of the two, I would say IDEA is the more mature and powerful, but Eclipse has the advantage of being open source (in other words, free).
On a final note, don't feel too pressured into actually having to use an IDE. Command-line development using a simple editor (such as TextPlus or VIM) is quite practical for J2ME development. All you really need to do is edit files, compile, and run the emulators. (Many developers find this faster on more limited-development machines, given how piggy modern IDEs are getting to be on system resources.) In addition, the vast majority of IDE featureswizards, J2EE server integration, Swing layout toolsare generally useless for J2ME development. This might change over time, especially given the explosion in J2ME popularity, but until then IDEs are mostly a convenience, not a requirement.