Motorola
Motorola, like Nokia, provides an excellent SDK for their MIDs. The Motorola J2ME SDK includes an excellent extensions API that is both highly functional and well put together. The SDK also includes emulators for all the major phone models.
The two major APIs included are the Lightweight Windowing Toolkit and the Game API. Of these, I'll only review the Game API. Don't get me wrongthe LWT is an excellent tool for applications requiring extra UI features, but these are less important for gamers so I'll just stick to the Game API.
The significant classes of the Game API provide functionality for:
Graphics rendering using double buffering
Sound effects and music
Support for simultaneous key presses
Sprites
Direct pixel and palette manipulation
Image scaling
In the following sections, you'll take a look at these in more detail. However, given that I've already covered two other APIs, I'll move a little faster. Ready?
Setup
To download the latest SDK and emulators, visit the Motocoder Web site at http://kb.motorola.metrowerks.com/motorola.
To compile you will need to add cldc.zip, midp.zip and lwt.zip to your CLASSPATH. They are located in the Emulator7.5\lib directory under the Motorola J2ME installation directory.
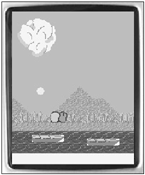
To test that everything is set up, I recommend loading the Launchpad (an application included with the SDK) and running some of the sample games. You can see the results in Figure 6.11.
Figure 6.11. A Motorola game example running in the emulator.
GameScreen
The GameScreen class provides functionality to cater to typical game requirements, such as buffered graphics and sound playback. It also provides an enhanced user input system that supports simultaneous key presses.
Using GameScreen is relatively painless. (I'm hoping you don't like pain all that much.) However, it's a little different from the typical utility classes you've seen. GameScreen acts as a framework for graphics rendering, sound and music playback, and input handling, so you need to structure your game around a game loop with GameScreen at the core. During each pass through the game loop, you should check for input, process things, and then render the results onto GameScreen's off-screen buffer before you finally flush the buffer onto the screen. Take a look at a sample of this process in action:
private void gameLoop(GameScreen gs)
{
    Graphics g = gs.getGraphics();

    // check key states
    int keys = gs.getKeyStates();
    if ((keyState & DOWN_KEY) != 0)  playerSprite.move( 0,  1);
    if ((keyState & UP_KEY) != 0)    playerSprite.move( 0, -1);
    if ((keyState & RIGHT_KEY) != 0) playerSprite.move( 1,  0);
    if ((keyState & LEFT_KEY) != 0)  playerSprite.move(-1,  0);

    // do other game processing here... such as AI
    ...

    // clear the background
    g.fillRect(getWidth(), getHeight());

    // draw player's sprite
    playerSprite.draw(g);

    // flush the buffer to the display
    gs.flushGraphics();
NOTE
Tip
For a full working example of this take a look at the KeyTest MIDlet in the Motorola demos directory (\Motorola\SDK v3.1 for J2ME\demo\com\mot\j2me\midlets)
The first thing to note here is how you grab a typical MIDP LCDUI Graphics object from the GameScreen class (Table 6.12 lists the available methods). This lets you use all the normal graphics tools, with the rendering results going to GameScreen's off-screen buffer. Another thing to note is that (contrary to an obvious oversight in the API documentation) GameScreen extends javax.microedition.lcdui.Canvas, so all the functionality of Canvas is available as well.
|
Method |
Description |
|---|---|
|
GameScreen() |
Constructs a new GameScreen. |
|
void enableKeyEvents(boolean enabled) |
Turns on or off key events. |
|
int getKeyStates() |
Gets the state map of the GameScreen keys. |
|
void flushGraphics() |
Draws any off-screen buffer content on the screen. |
|
void flushGraphics(int x, int y, int width, int height) |
Flushes only part of the buffer. |
|
void paint(Graphics g) |
Paints the GameScreen. |
|
static int getDisplayColor(int color) |
Asks the device to return the actual color as it would be rendered. |
|
protected Graphics getGraphics() |
Returns the LCDUI Graphics class associated with the GameScreen. |
|
boolean backgroundMusicSupported() |
Returns true if the MID can play music files. |
|
void playBackgroundMusic(BackgroundMusic bgm, boolean loop) |
Starts playback of a background music object. |
|
void playSoundEffect(SoundEffect se, int volume, int priority) |
Starts playback of a sound effect. |
|
boolean soundEffectsSupported() |
Returns true if the underlying device supports sound. |
|
void getMaxSoundsSupported() |
Returns the number of simultaneous sounds the device can play back. |
| void stopAllSoundEffects() |
Kills all sound effects currently playing. |
After you get the Graphics context, the getKeyStates method call determines the current state of key presses. This method returns an integer with bits set to indicate the combination of keys that are currently pressed. As you can see, you then just logically AND the results to determine whether a particular key is pressed.
NOTE
Tip
Given that key presses might happen very quicklypossibly at a time when you are not checking the states of keysyou might miss that the user actually pressed the key. If your game is processing its main loop quickly, then generally you will want to respond to any key that was pressed since you last checkedeven if the key is down at that instant. To support this, GameScreen will indicate that a key is down if it has been pressed since the last call to getKeyStates. You can disable this latching behavior by just calling getKeyStates twiceonce to clear it, and then again to check at that instant. This will result in a true representation of whether the key is actually down at the time you're calling.
After you check the key states, you can take action based on what the player is doing and render the result to the off-screen buffer. Once everything is done, a call to flushGraphics will take care of rendering the off-screen buffer onto the MID's display.
GameScreen also acts as the player for sound effects and music. There are two classes for producing sounds on Motorola MIDs: SoundEffect, which lets you play simple sounds, and BackgroundMusic (Table 6.13 lists the API for both these classes), for playing MIDI music. To determine whether the underlying device supports these functions, use the backgroundMusicSupported and soundEffectsSupported methods.
|
Class |
Description |
|---|---|
|
com.motorola.game.SoundEffect | |
|
static SoundEffect createSoundEffect(String resource) |
Creates a sound effect based on a resource loaded from a URL. |
|
com.motorola.game.BackgroundMusic | |
|
static BackgroundMusic createBackgroundMusic(java.lang.String name) |
Creates background music loaded from a URL. |
You can use SoundEffect to load a local sound resource from a file and then make it available for playback. In essence, you set up a sound resource and then fire it whenever you need to play back the sound. A sound resource is typically in the form of a WAV file. Take a look at an example:
SoundEffect explosionSound = null;
try
{
    explosionSound = SoundEffect.createSoundEffect("/whabam.wav");
}
catch(FileFormatNotSupportedException fe)
{ }
From this code, you can get the general idea of how things work. Actually, it's simpler than you think. The SoundEffect class has a single static method called createSoundEffect, to which you pass the name of a resource. The resource name can also be a URL pointing to an HTTP resource, such as http://your-site.com/explode.wav.
The BackgroundMusic class is just as simple, except the resource you're loading is a type 0 or 1 MIDI music file (MID). For example:
BackgroundMusic karmaChameleon = null;
try
{
    karmaChameleon =
       BackgroundMusic.createBackgroundMusic("http://boy-george.com/kc.mid");
}
catch(FileFormatNotSupportedException fe)
{ }
When you have a sound or music resource ready to go, you can start playback by calling the GameScreen class's playBackgroundMusic and playSoundEffect methods.
Sprites and PlayField
Motorola also included good implementations of a general-purpose Sprite class and world manager in the form of the PlayField class. As with Siemens, I'm not going to go into the details about these classes because you'll be developing better implementations in later chapters. Feel free to browse the javadoc for details. Motorola has done a good job, but we're going to do a better one.
ImageUtil
Like Nokia, Motorola provides some excellent image tools, including direct pixel access and image scaling (no rotation or reflection, though). Silly, isn't it? You get rotation from Nokia and scaling from Motorola. Maybe if you get players to buy one of each and hold them really close together, you can combine the effects somehow. Not!
Motorola's direct pixel access methods are the best of the manufacturer bunch. You just grab 24-bit RGB values straight from an image. No worries about underlying implementations, you are removed from the gory details, thankfully. To grab the pixel data, use the getPixels method in the ImageUtil class (Table 6.14 lists the API). This will return an array of integers with color data in the form of 0x00RRGGBB. You can manipulate this data (as you did in the Nokia section) and then draw those pixels back onto an image.
|
Method |
Description |
|---|---|
|
static void getPixels(Image src, int[] rgbData) |
Gets the pixel data from an image. |
|
static void getPixels(Image src, int x, int y, int width, int height, int[] rgbData) |
Gets the pixel data from a region of an image. |
|
static void setPixels(Image dest, int[] rgbData) |
Sets pixel data on an image. |
|
static void setPixels(Image dest, int x, int y, int width, int height, int[] rgbData) |
Sets pixel data in a region on an image. |
|
static Image getScaleImage(Image src, int width, int height, int method) |
Returns a scaled version of the original image. |
The ImageUtil class also provides a method to scale an image to a different size. Like reflection and rotation in the Nokia API, scaling can be very useful (though not as useful as reflection and rotation) for creating different versions of the same sprites, such as creating bigger versions of the same enemy ship to represent stronger types.
To scale an image, call the getScaleImage method and pass in the source image and the new size. You can also choose from three types of scaling methods that vary considerably in performance: SCALE_AREA, SCALE_REPLICATE, and SCALE_SMOOTH. Feel free to experiment.
PaletteImage
The PaletteImage class (Table 6.15 lists the methods) allows you to manipulate an image's palette, rather than having to adjust pixels as well. This is a much simpler and faster way to change just the color components of the image, and you can use it to generate some interesting effects.
|
Method |
Description |
|---|---|
|
PaletteImage(byte[] data, int offset, int length) |
Constructs a new PaletteImage. |
|
PaletteImage(String name) |
Constructs a new PaletteImage using data loaded from the named resource. |
|
Image getImage() |
Returns an image with the adjusted palette. |
|
int[] getPalette() |
Gets the current palette as an array on 24-bit RGB integers. |
|
int getPaletteEntry(int index) |
Gets a specific palette entry using an index. |
|
int getPaletteSize() |
Gets the size of the palette. |
|
void setPalette(int[] newPalette) |
Sets a new palette for the image. |
|
void setPaletteEntry(int index, int color) |
Sets the specified entry in the palette. |
|
void setTransparentIndex(int index) |
Changes the transparent index. |
|
int getTransparentIndex() |
Returns the index of the transparent color. |
A good example of pixel color manipulation is the trick you did in the Nokia API, where you changed one color on an image to another. You can do the same thing by adjusting the palette for the image, rather than the pixels themselves. For example:
PaletteImage redStripe = new PaletteImage("redstripe.png");

// Get the palette entries
int[] palette = new int[redStripe.getPaletteSize()];
palette = redStripe.getPalette();

// Find our max red and change it to max green
for (int i=0; i < redStripe.getPaletteSize(); i++)
{
    if (palette[i] == 0xFF0000)
          redStripe.setPaletteEntry(i, 0x00FF00);
}
Image greenStripe = redStripe.getImage();
NOTE
Tip
Although there is no support for alpha channels, you can use the setTransparentIndex to indicate one of the palette entries that will render transparently.