Build Systems
Build systems are a traditional part of software developmentthey've been around almost as long as programming languages have. A build system lets you automate many of the typical development tasks such as compiling, packaging, and versioning. You can think of it as a big scripting system for your software projects.
One of the best reasons to use a build system is to automate rebuilding your projects to suit different device ports or languages. As you saw when you customized Star Assault to use the features available in the Nokia UI, you need to maintain different versions of your code in order to support different MID features.
As you start to add this support for more device formats, as well as for other languages, graphics, and resources, you'll quickly end up in a mess. A build system makes this process manageable (if not easy and fun).
Another great reason to use a build system is to access the extra tools available from third parties. You'll find a huge number of plug-ins for build systems that can automate all sorts of things for you. For J2ME development in particular, you can use the Antenna system (a plug-in for the Ant build system) to add features such as source code preprocessing and automated packaging and obfuscation (a class file optimization method that reduces file sizes).
For Java, the best build system is Ant, part of the open-source Apache Jakarta project. You can start by getting Ant set up and running.
Setting Up Ant
Ant is available free from its home page, http://ant.apache.org .You'll need to download the latest version (I've also included a copy on the CD) and unzip it to an appropriate directory on your machine. The system requirements for Ant are very light; basically, if you're using your machine for J2ME development, you should have no trouble using Ant.
Typically developers use Ant either from the command line or through integration in an IDE. Most modern IDEs directly support the use of Ant builds, so I recommend a little investigating as to what integration might be available.
To run Ant from the command line, you first need to set up the ANT_HOME environment to point to the directory where you unzipped the distribution (see Chapter 4 for a reminder on setting environment variables). For example:
set ANT_HOME= c:\java\ext\jakarta-ant-1.5.4
You should also add the bin directory to your path.
set PATH=%PATH%;%ANT_HOME%\bin
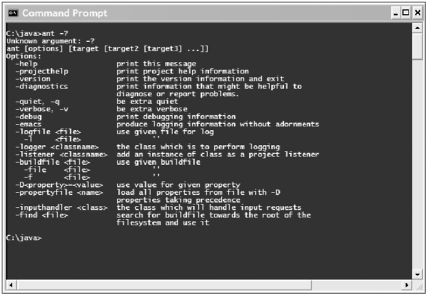
For Ant to function correctly, you also need to have the JAVA_HOME environment set to the location of your JDK. If you're not sure whether it's set correctly, then check. Having it set incorrectly can result in weird errors down the road. To make sure everything is set up correctly, enter the following at a command prompt:
ant -?
You can see the result in Figure 14.5.
Figure 14.5. The output from executing the ant with the help option
Creating a Build File
To use Ant, you need to create an XML-formatted text file known as a build file. You can think of it a little like a scripting system, with the build files being your script and Ant being the interpreter.
The structure of an Ant build file follows the same thought process as traditional make filesthat is, you define everything in terms of build targets.Take a look at a simple build file, and I'll show you what I mean.
NOTE
Tip
You can see a complete example of a build.xml file in the Star Assault project directory on the CD.
<project name="My Project" default="compile">

    <target name="init">
        <property name="sourceDir" value="src" />
        <property name="outputDir" value="classes" />
    </target>

    <target name="clean" depends="init">
        <delete dir="${outputDir}" />
        <mkdir dir="${outputDir}" />
    </target>
    <target name="compile" depends="clean">
        <javac srcdir="${sourceDir}" destdir="${outputDir}" />
    </target>
</project>
In this example I'm defining three separate targets: init, clean, and compile.These are three tasks that I want to perform as part of the build process. init sets up the parameters (such as directory names), clean removes any files from a previous build process, and compile runs javac to build all the source files.
To run this build process with Ant, you would specify one of the targets. For example, run the following with the build.xml file in the current directory:
ant f build.xml clean
This will execute all the tasks in the clean target. If you ran this build process, you'd see something like this:
$ ant -f build.xml clean
Buildfile: build.xml

init:

clean:
    [delete] Deleting directory C:\java\classes
     [mkdir] Created dir: C:\java\classes

BUILD SUCCESSFUL
Total time: 1 second
Notice how Ant processed the init target as well? That's because you defined the clean target to be dependent on the init target (depends="init"). Ant therefore executed the tasks in the init target first. If you look down at the compile target, you can see that it depends on the clean target. I reckon you can guess what happens if you build using that target. Here's the output:
$ ant -f build.xml compile
Buildfile: build.xml

init:

clean:
    [delete] Deleting directory C:\java\classes
     [mkdir] Created dir: C:\java\classes
compile:

BUILD FAILED
file:c:/java/build.xml:14: srcdir "C:\java\src" does not exist!

Total time: 1 second
As you can see, Ant executed the dependents (init and clean) prior to the compile task. Don't worry about the error.
Building up dependent targets is a little like programming, but in reverse. You get the hang of it pretty fast. Now take a closer look at the tasks that make up each of these targets after all, they're doing all the work.
Tasks
Ant tasks are a little like statements in Java; each one carries out a specific task for you. Like everything in Ant build files, you write tasks using XML tags. A good example is the delete task used in the clean target.
<delete dir="${outputDir}" />The great thing about Ant is the huge variety of tasks available, many of which are very natural to Java programmers. Table 14.1 is a short list of some of the more useful ones. I recommend reviewing the Ant manual for a complete list.
|
Task |
Description |
|---|---|
|
copy |
Copy a file or directory. |
|
cvs |
Access a CVS repository. |
|
delete |
Delete a file or directory. |
|
echo |
Output a message to the console. |
|
exec |
Execute another application. |
|
get |
Get a file using a URL. |
|
jar |
Jar a set of files. |
|
java |
Execute a java task. (Creates a new Virtual Machine) |
|
javac |
Compile some java source files. |
|
|
E-mail something to someone. |
|
mkdir |
Make a new directory. |
|
mve |
Move a file or directory. |
|
sql |
Execute an SQL statement. |
|
zip |
Create a zip archive. |
One of the most powerful things about Ant is that it gives you the ability to create your own custom tasks. After you've become familiar with using it, I recommend you invest a little time learning how to make up new tasks. You'll be amazed what you can do.
Properties
In previous examples, you would have noticed the use of values such as ${blah}.A value such as this is an Ant property. It's just like any field (variable) you would use in a program. You can declare a property using the format:
<property name="outputDir" value="classes" />
This creates a new property you can access using ${outputDir}.Remember that you need to declare the properties in your build file before you use them.
As I did in the earlier example, it's common practice to declare properties for all your project-specific settings, such as specific directory or file names, inside an init target at the top of your project.
Using Antenna
Antenna is a library of tasks for Ant specifically to help with J2ME development. There's direct support for compiling, preverifying, packaging, obfuscating, and executing your MIDlets from your build script. There's also a very handy Java code preprocessor that you'll use to handle all those different build cases. Table 14.2 lists the important Antenna tasks.
|
Task |
Description |
|---|---|
|
wtkjad |
Update or create JAD files (including all the properties). |
|
wtkbuild |
Similar to Ant's javac task, except it handles bootclasspath. |
|
wtkpackage |
Similar to Ant's jar task, but it adds better handling of JAD files and allows for other J2ME steps such as obfuscation and preverification. |
|
wtkrun |
Runs a MIDlet suite in the Wireless Toolkit's emulator. |
|
wtkpreverify |
Used for preverifying a set of classes. (Not normally required because the build and package tasks will do this for you.) |
|
wtkobfuscate |
Used for obfuscating a JAR file. (Not normally required because the packaging task will obfuscate as well.) |
|
wtksmartlink |
Detects and removes unnecessary classes from a JAR file. |
|
wtkpreprocess |
Java source preprocessor like you'd find in C. |
Setting Up Antenna
You can obtain the latest copy of Antenna from http://antenna.sourceforge.net . To get it working with Ant, you need to copy the JAR file into Ant's lib directory. To make the tasks available in Ant, you need to declare them using Ant's taskdef task. To keep this nice and organized, I usually put my task declarations in a setup target and place it way down at the bottom of the build file (where I'll hopefully never have to look at it again). Here's the setup target, including the declarations for all the Antenna tasks:
<target name="setup">
    <!-- Antenna Setup -->
    <taskdef name="wtkjad" classname="de.pleumann.antenna.WtkJad"/>
    <taskdef name="wtkbuild" classname="de.pleumann.antenna.WtkBuild"/>
    <taskdef name="wtkpackage" classname="de.pleumann.antenna.WtkPackage"/>
    <taskdef name="wtkmakeprc" classname="de.pleumann.antenna.WtkMakePrc"/>
    <taskdef name="wtkrun" classname="de.pleumann.antenna.WtkRun"/>
    <taskdef name="wtkpreverify" classname="de.pleumann.antenna.WtkPreverify"/>
    <taskdef name="wtkobfuscate" classname="de.pleumann.antenna.WtkObfuscate"/>
    <taskdef name="wtksmartlink" classname="de.pleumann.antenna.WtkSmartLink"/>
    <taskdef name="wtkpreprocess" classname="de.pleumann.antenna.WtkPreprocess"/>
</target>
Keep in mind that for this to work, you need to execute the setup target before you use any of these tasks. The best method to do this is to make the init target depend on it. For example:
<target name="init" depends="setup">
Now that you have Antenna tasks ready to go, take a look at a basic build script for a J2ME project.
A Basic Build
For a J2ME project, the main components of a build file using Antenna carry out the following steps: initialize (and set up) the build, clean up any old files, compile the project, create the JAD file, create the JAR, and then run the emulator. Here's the entire thing, although I've excluded the setup target to keep it short:
<project name="StarAssault" default="run nokia" basedir=".">

    <!-- ............................ INIT .................................. -->
    <target name="init" depends="setup">
        <property name="wtk.home" value="c:\java\wtk104"/>
        <property name="midlet.name" value="StarAssault"/>
    </target>

    <target name="device build" depends="init">
        <property name="bd" value="build"/>

        <delete dir="${bd}/classes"/>
        <mkdir dir="${bd}/classes"/>

        <!-- compile -->
        <javac destdir="${bd}/classes" srcdir="${bd}/psrc"
            bootclasspath="${midplib}" debug="true" target="1.1"/>

        <!-- create JAD file -->
        <wtkjad jadfile="${bd}/${midlet.name}.jad"
            jarfile="${bd}/${midlet.name}.jar"
            name="${midlet.name}" vendor="Martin Wells" version="1.0.0"/>

        <!-- create JAR file -->
        <wtkpackage jarfile="${bd}/${midlet.name}.jar"
            jadfile="${bd}/${midlet.name}.jad"
            preverify="true"
            classpath="${midplib}"
            obfuscate="true">

            <fileset dir="${bd}/classes"/>
            <fileset dir="${bd}/res"/>
        </wtkpackage>
    </target>

    <target name="run nokia" depends="device build">
        <exec executable="C:\j2me\Nokia\Devices\Nokia_7210_MIDP_SDK_v1_0\bin\7210.exe">
            <arg line="build/${midlet.name}.jad"/>
        </exec>
    </target>

    ... setup target

</project>
The first line of this example declares the project and sets the base directory to the current directory (.). For our purposes the current directory is wherever Ant is executed. All non-relative directories (ones that don't start with a /) you use in the project will be relative to this one. Using the directory from which you execute ant is typically fine. The project line also sets the default target to be run nokia. Ifyou don't specify a target on the command line, the Ant interpreter will execute this one for you.
<project name="StarAssault" default="run nokia" basedir=".">
The next section is the typical property declaring an init target. You'll see these parameters in action in a bit.
<target name="init" depends="setup">
    <property name="wtk.home" value="c:\java\wtk104"/>
    <property name="midlet.name" value="StarAssault"/>
</target>
The next target, device build, is where all the action is. First you declare the target (depending on init) and then you set up a build directory property named "bd" (though you can name it something different if you like), in which all your build files will go later. After that you use delete and mkdir tasks to clean out the results of any previous builds. The midplib property is used to point to the correct MIDP libraries for the device you're building for.
<target name="device build" depends="init">
    <property name="bd" value="build"/>
    <property name="midplib" value="${wtk.home}/lib/midpapi.zip"/>
    <delete dir="${bd}/classes"/>
    <mkdir dir="${bd}/classes"/>
The next step in the build process is to compile the source. Here I'm just using the Ant javac task along with the appropriate bootclasspath and target version number. (Remember to use target="1.2" if you're using the Wireless Toolkit version 2.) You could use the Antenna task, but I don't think it really adds anything, so it's cleaner (and more flexible later) to just stick with javac.
<!-- compile -->
<javac destdir="${bd}/classes" srcdir="src"
       bootclasspath="${midplib}" debug="true" target="1.1"/>
After the classes have been compiled, you create the JAD file. You can add any additional attributes you want in here.
<!-- create JAD file -->
<wtkjad jadfile="${bd}/${midlet.name}.jad"
        jarfile="${bd}/${midlet.name}.jar"
        name="${midlet.name}" vendor="Martin Wells" version="1.0.0"/>
You can then package up your classes (and other files) into the JAR. To do so, you use the coolest of the Antenna tasks, wtkpackage.It preverifies and then JARs up everything all in one go. I'm including the content of the classes and res directories (where all your graphics and other resource files should go).
<!-- create JAR file using the specified JAD and other options -->
<wtkpackage jarfile="${bd}/${midlet.name}.jar"
             jadfile="${bd}/${midlet.name}.jad"
              preverify="true"
              classpath="${midplib}">

    <fileset dir="${bd}/classes"/>
    <fileset dir="${bd}/res"/>
</wtkpackage>
The final part of the build process is to run the game in an emulator. Again, I'm not using the Antenna task because I don't think it really adds anything. You can create any number of these types of tasks to run on different emulators.
<target name="run nokia" depends="device build">
    <exec executable="C:\j2me\Nokia\Devices\Nokia_7210_MIDP_SDK_v1_0\bin\7210.exe">
        <arg line="build/${midlet.name}.jad"/>
    </exec>
</target>
To get all this working, you need to place all your source files in the src directory and all the graphics and other resources in the res directory. If you then place the build.xml file in the root of your project's directory and execute ant (by itself), you'll have a fully auto-built project running in an emulator before you know it.
Obfuscation
The class files produced by the Java compiler (bytecode) retain much of the information you have inside your sourcethings like the full class, method, and field names (but not comments). Because humans never read bytecode, you might ask whether there is really a difference in calling a method a() rather than loadNewObjectFromHeapPoolInstanceNowPleaseOK(). If you used names like a(),your code would be hopelessly confusing, but to a bytecode interpreter it makes no difference. It does, however, make a big difference to the size of the resulting class file. All those long names equate to more actual bytes in the class, and thus the final JAR file.
An obfuscator (try saying that quickly while eating peanuts) simply "renames" all the string names in your class files with shorter names (such as a(), b(), and so on). The end result is typically a 20- to 50-percent reduction in the final size of your files.
To add support for this in your projects, you can use the ProGuard obfuscator by Mark Welch. You can download it from http://proguard.sourceforge.net.
To make the ProGuard obfuscator work with Antenna, you need to copy the ProGuard JAR file to the Ant lib directory. Now comes the really difficult and complicated part enabling obfuscation using Antenna. Here's the wtkpackage task, this time with obfuscation enabled:
<wtkpackage jarfile="${bd}/${midlet.name}.jar"
             jadfile="${bd}/${midlet.name}.jad"
             preverify="true"
             obfuscate="true"
             classpath="${midplib}">

    <fileset dir="${bd}/classes"/>
    <fileset dir="${bd}/res"/>
</wtkpackage>
All you have to do is add the obfuscate="true" and, assuming you have the ProGuard JAR in the right place, Antenna takes care of the rest. Okay, so it wasn't that hard….
Now you've got the basic build process out of the way. But Antenna still has one trick up its sleevethe preprocessor. In the next section, you'll see how you can use the preprocessor to build multiple versions of the same project.
Preprocessing
Now you get to the really great thing about Antennathe preprocessor. This nifty little feature lets you generate different source code based on conditionals and includes that you can embed inside your source. Table 14.3 lists the preprocessor commands that are available.
For this to work, you need to add another step into the compile process. Before compiling the Java source files, you run them through the Antenna preprocessor task. The output from this is a new Java source file incorporating changes made by the preprocessor.
|
Command |
Description |
|---|---|
|
#define |
Defines an identifier for later use in an ifdef. |
|
#undefine |
Undefines an identifier so that an ifdef returns false. |
|
#if |
Tests an expression, such as #if (DEBUG) || (TEST). |
|
#elif |
Tests an expression (as an alternative to an if). |
|
#ifdef |
Tests whether an identifier is defined, such as #ifdef DEBUG. |
|
#ifndef |
Tests whether an identifier is not defined. |
|
#else |
Used to include code as an alternative to an #ifdef or #ifndef. |
|
#elifdef |
Tests a new identifier as an alternative to a previous #ifdef. |
|
#elifndef |
Similar to #elifdef, but tests whether an identifier is not defined. |
|
#endif |
Used to close an i#fdef. |
|
#include |
Includes the contents of a file; must be closed with an #endinclude. |
Obviously you can't overwrite your existing source code with the preprocessed ones (at least not more than once), so you need a new directory other than src to store the results of the preprocessor. For this I use build/psrc.
To use the preprocessor, you need to add a new task into the build file just prior to compilation (the javac task). Notice I've also changed the compile task to use the preprocessed source directory. Let me clarify this for you: You have to preprocess your files before they can be compiled.
<!-- preprocess -->
<property name="debug" value="debug"/>
<wtkpreprocess srcdir="src" destdir="${bd}/psrc" symbols="${debug}"
                verbose="true"/>

<!-- compile -->
<javac destdir="${bd}/classes" srcdir="${bd}/psrc"
        bootclasspath="${midplib}" debug="true" target="1.1"/>
Just before the wtkpreprocess task, I've declared a property called debug with the value debug. I then include this value in the symbols parameter when calling the preprocessor. You can use these symbols in any preprocessor expression (such as #ifdef).
All right, now you're ready to add some preprocessing instructions to your source code. Preprocessor commands are added directly into Java source code as comments, which means your IDE won't freak out. Here's an example of a conditional compile based on whether you declared the debug symbol:
//#ifdef debug
    System.out.println("I am in debug mode!");
//#else
    System.out.println("I am NOT in debug mode!");
//#endif
If you now run the preprocessor over this code (with the debug symbol set), you'll get a new file in the build/psrc directory with the code:
//#ifdef debug
    System.out.println("I am in debug mode!");
//#else
//#   System.out.println("I am NOT in debug mode!");
//#endif
Notice the preprocessed version of this code has the second print line commented out. This is all the preprocessor does; it simply comments out anything in the source that doesn't match the conditionals. Commenting is better than simply removing the source from the resulting file because it makes it easier to debug preprocessing results. (Sometimes preprocessing conditionals can get quite complicated so it's good to check the result.) This also means the line numbers won't change when you're debugging code.
Keep in mind that comments are only included in your source file if you've turned on debug outputand even if left in they will be removed by the obfuscatorso they take effectively no space in the resulting JAR file.
NOTE
Note
Keep in mind that once you start using a preprocessor, you'll no longer be able to compile your code using an IDE; things just won't work as you intended. It might be worth exploring the capabilities of your system, though. Some IDEs let you run an Ant task prior to compiling.
The other useful preprocessor command is #include.This is great if you want to embed entirely different versions of files (such as resource tables) or alternative implementations of methods or classes. Typically, I try to avoid using #include because most IDEs don't deal well with fragments of Java code in different files.
Those are the basics of using the preprocessor, although actually it doesn't get much more complicated than that anyway. Next you'll see how to use the preprocessor to help you build different versions of the game for different conditions.