Developing with MIDP 2
To get started developing with MIDP 2, you'll need to download Wireless Toolkit version 2 (Toolkit 2) from Sun. You can download this from http://java.sun.com/products/j2mewtoolkit.
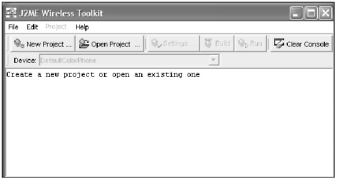
You'll find the Toolkit 2 (shown in Figure 19.1) to be familiar territory; pretty much everything remains the same. Once you have it installed you're ready to modify the build system to support an MIDP 2 target device.
Figure 19.1. The Wireless Toolkit 2.0's new features are almost exclusively related to MIDP 2 development.
NOTE
Tip
Remember to copy your obfuscator JAR file (retroguard.jar) to the Toolkit 2 bin directory.
MIDP 2 Build System
To get started building MIDP 2 applications, you need to make some changes to your build system. Given that MIDP 2 is not a replacement, you need to make sure you can continue to build for MIDP 1 as well. Thankfully, this isn't too difficult. Take a look at how to modify the build system for Star Assault to accommodate development on both platforms.
The first thing you need is a new build target for an MIDP 2 device. To handle this properly, you really want to build against the Toolkit 2 installation, not Toolkit 1. The build process gets the location of the Toolkit from the wtk.home parameter set inside the init target.
<project name="StarAssault" default="compile" basedir=".">
    <target name="init" depends="setup">
        <property name="wtk.home" value="c:\java\wtk104"/>
        ...
You then use this parameter inside a device's build target. For example:
<target name="build default" depends="init">
    <property name="dev" value="default"/>
    <property name="midplib" value="${wtk.home}/lib/midpapi.zip"/>
    <antcall target="device build"/>
</target>
To build for MIDP 2, obviously all you need to do is change the value of the wtk.home property to wherever you installed the Toolkit 2. For example:
<project name="StarAssault" default="compile" basedir=".">
    <target name="init" depends="setup">
        <property name="wtk.home" value="c:\java\wtk20"/>
        ...
Although this will work for building both MIDP 1 and 2 targets, it's not recommended practice by Sunand it can be misleading if MIDP 2 features are accidentally compiled into an MIDP 1 device build. To solve this, one method might be to leave the wtk.home property set in the init target to be Toolkit 1, and then override the value for MIDP 2 builds. For example:
<project name="StarAssault" default="compile" basedir=".">
    <target name="init" depends="setup">
        <property name="wtk.home" value="c:\java\wtk104"/>
        ...
    </target>

    <target name="build default" depends="init">
        <!--OVERRIDE  WARNING THIS DOESN'T WORK WITH ANT -->
        <property name="wtk.home" value="c:\java\wtk20"/>
        <property name="dev" value="default"/>
        <property name="midplib" value="${wtk.home}/lib/midpapi.zip"/>
        <antcall target="device build"/>
    </target>
Ant, however, won't let you do this because you can't change property values after they've been set to an initial value. At this point, you could get rather complicated by inverting the build process to accommodate this; however, in practice I've found you just end up with an overly complex build system. The easier method is to specify the wtk.home directory in each of the build targets. For example:
<project name="StarAssault" default="compile" basedir=".">
    <target name="init" depends="setup">
        <!-- NO WTK.HOME SET -->
        ...
    </target>

    <target name="build default" depends="init">
        <property name="wtk.home" value="c:\java\wtk20"/>
        ...
    </target>
To r un the game now, you need to add a target to execute the Toolkit 2 emulator. One problem you'll encounter when doing this is the current MIDP_HOME environment variable. Because it points to the Toolkit 1 directory, the Toolkit 2 emulator won't run. To handle this you need to override the environment variable with a different value when you execute the Toolkit 2 target. For example:
<target name="run defmidp2" depends="build default">
    <exec executable="C:\java\WTK20\bin\emulator.exe" >
        <env key="MIDP_HOME" value="c:\java\WTK20"></env>
        <arg line="-Xdescriptor:build/${dev}/${midlet.name}.jad"/>
    </exec>
</target>
Notice the addition of the env tag. This lets you set an environment variable when you are executing an application. In the preceding example, I'm pointing the environment variable to the Toolkit 2 installation directory.
NOTE
Tip
If you get an untrusted domain error when you run the MIDP 2 emulator, then your MIDP_HOME environment variable is pointing to the wrong version of the Toolkit. Make sure it's set to the home directory where you installed the Toolkit 2 when you attempt to run an MIDP 2 application.
Along with the modifications to the build script, you'll likely need to set up your IDE to utilize the newer midpapi.zip class files included with the Toolkit 2. Because these are backwards-compatible, you can usually do this without disturbing the MIDP 1 build process.
When you have all this running, you'll be able to get Star Assault working on the MIDP 2 default emulator, as shown in Figure 19.2.
Figure 19.2. Star Assault running in the MIDP 2 default emulator

One thing to look out for is that the Toolkit 2 includes class files for CLDC 1.0, not CLDC 1.1, so you won't see any reference to new CLDC features. To develop for CLDC 1.1, you'll need the CLDC 1.1 RI (Reference Implementation), which is available at http://java.sun.com/products/cldc.
Okay, that's all you need to be set up for MIDP 2 development. Now you can take a more detailed look at what you can do with these new features.