User Interface (LCDUI)
Okay, on to some more fun stuffuser interfaces. The MIDP allows you to use two distinct interface systems when creating a gamethe high-level UI and the low-level UI. The difference between these two UIs comes down to the nature of MIDs themselves; they aren't computers. I know this sounds obvious, but take a minute to review the practical differences; I think it will provide some perspective on the design of the MIDP user interface.
First, device interfaces, form factors, and installed software differ widely across the industry. They all look basically the same (well, most of them do), but there is a never-ending variety of input controls (such as spin dials, mini-joysticks, sliders, flippers, and even fingers), all of which provide distinctly different interface controls.
The basic screen size is much smaller than its desktop computer counterparts. Programming an interface with a 15-inch screen will feel like playing skirmish across the Sahara desert compared to the size of the average mobile phone screen. The screen sizes also vary widely. Another difference is the amount of interaction you'll get from the user. Typically users play games using one hand, often only for short periods of time. The UI should also take into consideration the fact that the user is not likely to pay continuous attention to what's happening on the device.
Finally, users will be familiar with the controls of the MID's general operating environment, including all the preinstalled software. They will not be terribly interested in learning a new UI every time they download an application. Your game will ask the MID to do something, and it's the MID's job to then do it in a way with which the user is familiar.
Therefore, the high-level UI completely abstracts the device. There is no dependency in your code for how the device will actually implement these things. For example, the high-level UI deals in terms of commands, not in buttons or keys. It's up to the MIDP implementation on that particular device to display a command in a way that the user can see and then execute it. How this occurs is not your problem, it's the MID's.
Which brings you to a problem: Games typically display graphics, and you can't abstract graphics in this mannerit just isn't practical. That's where the low-level UI comes in. You can use it to go wild all over the screen if you want, but you need to handle things like variable screen sizes and key interception all on your own.
When you create a game, however, you won't be using the low-level UI exclusivelyyou need a mixture of both UIs. For example, your introduction, menus, and most data entry screens will use the high-level UI, but when it comes down to moving the little spaceships around, you use the low-level API. The complete class list for the LCDUI is shown in Table 5.14.
|
Class |
Description |
|---|---|
|
Interfaces | |
|
Choice |
Provides the common interface used to manage a selection of items. |
|
CommandListener |
Lets you create a listener for command events from the high-level UI. |
|
ItemStateListener |
Lets you create a listener class for changes to an Item object's state. |
|
UI System and Utility Classes | |
|
Display |
Represents the manager of the display and input devices of the system. |
|
Font |
Obtains font objects, along with their metrics. |
|
Image |
Provides a class for holding image data (in PNG format). |
|
AlertType |
Provides a helper class that defines the types of Alerts you can create, such as ALARM, CONFIRMATION, ERROR, INFO, WARNING. I sound like the robot from Lost in Space. |
|
Displayable |
Provides an abstract base class for an object that can be displayed. |
|
High-Level UI | |
|
Command |
Abstracts a user action on the interface. |
|
Screen Classes | |
|
Screen |
Provides a base class for high-level UI components. |
|
Alert |
Provides a screen to alert the user to something. |
|
List |
Provides a screen object that contains a list of choices. |
|
TextBox |
Provides a screen object used for editing text. |
|
Forms & Items | |
|
Form |
Provides a screen that acts as a container for one or more Items. |
|
Item |
Provides a base class for something you can stick on a Form (or an Alert). |
|
ChoiceGroup |
Provides a UI component for presenting a list of choices. |
|
DateField |
Provides a UI component to get the user to enter a date. |
|
Gauge |
Displays pretty graph bar to show progress. |
|
ImageItem |
Provides an Item that is also an Image. (See the Item entry for more information.) |
|
StringItem |
Provides an Item object for displaying a String. |
|
TextField |
Provides an Item used to edit text. |
|
Ticker |
Provides an Item that scrolls a band of text along the display. |
|
Low-Level UI | |
|
Graphics |
Provides 2D graphics tools. |
|
Canvas |
Provides the base class used to create low-level UI graphics. |
UI Basics
At the heart of the LCDUI is the concept of a screen, which represents a display on the MID. You can only have one screen visible at any point in time. (Reread that sentence a few timesit's a big clue to how all this works.) Think of the user interface as a deck of cards, where only one card is visible at any point in time. Each card is a screen.
There are three types of screens in the LCDUI:
Low-level UI. This is accessible through the Canvas class.
Form. This displays groups of simple UI components.
Complex components. These require the whole screen (such as any Screen class object like TextBox).
Basically anything displayed on a MID has to either be a screen or exist inside one (in the case of Form components).
The LCDUI class hierarchy is reasonably complex, so I'll also give you a quick rundown of how it all fits together (you can see the entire class hierarchy laid out in Figure 5.7). First, the classes all fall into one of following functional categories:
Figure 5.7. The LCDUI class hierarchy.
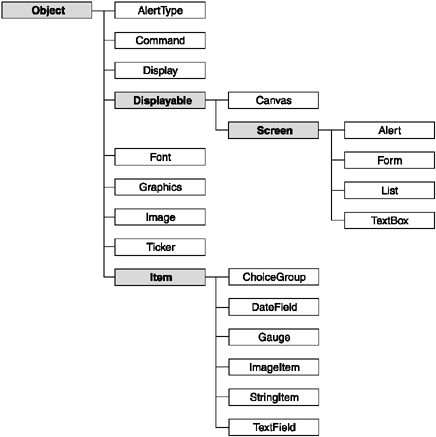
System or utility classes (such as Display, Font, AlertType, and Ticker)
Low-level API classes (such as Canvas and Graphics)
High-level API Screen classes (such as Alert, Form, List, and TextBox)
High-level API Form component classes (classes derived from Item, such as ChoiceGroup, DateField, Gauge, ImageItem, StringItem, and TextField)
You might be wondering about the difference between the Screen classes, which essentially take over the display, and the Form component classes, which appear functionally similar.
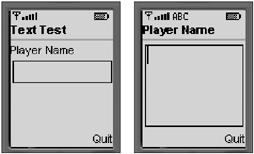
For example, what's the difference between a TextBox and a TextField? The answer really comes down to sophistication. A TextField is a simple control you can embed inside a form; it's a simple control with limited capabilities. The TextBox is the "level boss" of text-entry tools; it uses the entire screen and has additional features, such as clipboard (cut, copy, and paste) tools.
Another important distinction is that TextBox is a full-fledged screen in its own right, so you can give it a title, add commands, and listen for command events. In Figure 5.8, you can see the difference between a full-screen TextBox and its TextField counterpart.
Figure 5.8. A Form control TextField (left) compared to its full-screen counterpart, TextBox (right)
NOTE
Note
The Alert screen is a bit different than other Screen objects. Although it takes over the entire display, it cannot have commands like other Screens.
Display
Once upon a time, there was a lonely MIDlet named Gretel. Now poor Gretel, who had no arms, no legs, and no way to communicate, survived under the auspices of the evil Dr. AM. Life for Gretel was boring; life was meaningless.
One day, while looking through her collection of TimerTasks, Gretel the MIDlet noticed a knight riding in the distance. By his colors, she knew him to be the brave Sir Display. She cried out, but Sir Display only ignored her. No matter how loudly she yelled, he seemed deaf to her pleas.
At that very moment, a fairy appeared. (No, I'm not the fairy.) She told Gretel that to get Sir Display's attention, one must use the secret wordsgetDisplay. When Gretel uttered this strange phrase, Sir Display instantly connected with her. They were immediately married and lived happily ever afterat least until about eight seconds later, when the user accidentally dropped the mobile phone into his beer.
This fairy tale (if you can call it that) gives you a somewhat vague idea of the relationship between the MIDlet and the Display objectthe API is shown in Table 5.15. In short, there's only one Display object per MIDlet. It's available by default; you just have to access it using the getDisplay method. For example:
|
Method |
Description |
|---|---|
|
void callSerially(Runnable r) |
Serially calls a java.lang.Runnable object later. |
|
Displayable getCurrent() |
Gets the current Displayable object. |
|
static Display getDisplay(MIDlet m) |
Retrieves the current Display object for the MIDlet. |
|
boolean isColor() |
Determines whether the device supports color. |
|
int numColors() |
Determines the number of colors (or gray levels, if not color). |
|
void setCurrent(Alert alert, Displayable nextDisplayable) |
Displays Alert, and then falls back to display the nextDisplayable object. |
|
void setCurrent(Displayable nextDisplayable) |
Shows the nextDisplayable object. |
Display display = Display.getDisplay(this);
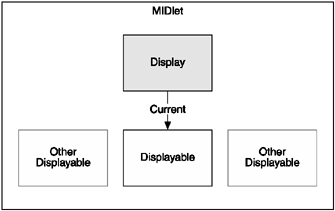
Then you can have any Displayable class object (such as a Screen or a Canvas) presented on the screen within a Display. To do this, you don't add the objects to the Display, you set the Displayable object to be current using the setCurrent method. You can see this concept illustrated in Figure 5.9. For example, the following code creates a TextBox object and sets it to be the current Screen on the display. (Remember, TextBox is derived for the Screen class, which in turn is derived from Displayable.)
Figure 5.9. A MIDlet can have many displayable objects instantiated, but only one can be current on the screen at any given time.
import javax.microedition.midlet.*;
import javax.microedition.lcdui.*;

/**
 * A demo of the TextBox Screen.
 * @author Martin J. Wells
 */

public class TextBoxTest extends MIDlet implements CommandListener
{
   private TextBox textBox;
   private Alert alert;
   private Command quit;
   private Command go;
   /**
    * MIDlet constructor creates a TextBox Screen and then adds in a go and
    * quit command. We then set this class to be the listener for TextBox
    * commands.
    */
   public TextBoxTest()
   {
      // Setup the UI
      textBox = new TextBox("Enter Thy Name", "Sir ", 20, TextField.ANY);
      go = new Command("Go", Command.SCREEN, 1);
      quit = new Command("Quit", Command.EXIT, 2);
      textBox.addCommand(go);
      textBox.addCommand(quit);
      textBox.setCommandListener(this);
   }

   /**
    * Called by the Application Manager when the MIDlet is starting or resuming
    * after being paused. In this example it acquires the current Display object
    * and uses it to set the Form object created in the MIDlet constructor as
    * the active Screen to display.
    * @throws MIDletStateChangeException
    */
   protected void startApp() throws MIDletStateChangeException
   {
      Display.getDisplay(this).setCurrent(textBox);
   }

   /**
    * Called by the MID's Application Manager to pause the MIDlet. A good
    * example of this is when the user receives an incoming phone call whilst
    * playing your game. When they're done the Application Manager will call
    * startApp to resume. For this example we don't need to do anything.
    */
   protected void pauseApp()
   {
   }

   /**
    * Called by the MID's Application Manager when the MIDlet is about to
    * be destroyed (removed from memory). You should take this as an opportunity
    * to clear up any resources and save the game. For this example we don't
    * need to do anything.
    * @param unconditional if false you have the option of throwing a
    * MIDletStateChangeException to abort the destruction process.
    * @throws MIDletStateChangeException
    */
   protected void destroyApp(boolean unconditional) throws MIDletStateChangeException
   {

   }

   /**
    * The CommandListener interface method called when the user executes a
    * Command, in this case we handle the the quit command we created in the
    * constructor and added to the Form, as well as the go command, which we
    * use to create and display an Alert.
    * @param command the command that was triggered
    * @param displayable the displayable on which the event occurred
    */
   public void commandAction(Command command, Displayable displayable)
   {
      try
      {
         if (command == quit)
         {
            destroyApp(true);
            notifyDestroyed();
         }

         if (command == go)
         {
            alert = new Alert("", "Greetings " + textBox.getString(), null,
AlertType.CONFIRMATION);
            Display.getDisplay(this).setCurrent(alert);
         }

      }

      catch (MIDletStateChangeException me)
      {
         System.out.println(me + " caught.");
      }
   }
}
NOTE
Note
A reference to a Display object is only valid between the application manager's calls to startApp and destroyApp. Don't be tempted to grab the Display object in your classes constructor and then cache it for the entire time the application runs. Just use the direct call to getDisplay whenever you need to.
Table 5.16 shows the API for the Displayable class. Keep in mind this is an abstract base class for the Screen and Canvas objects.
|
Method |
Description |
|---|---|
|
boolean isShown () |
Asks whether you are really on screen. |
|
void addCommand (Command cmd) |
Adds a new Command. |
|
void removeCommand (Command cmd) |
Removes a Command. |
|
void setCommandListener (CommandListener l) |
Sets a CommandListener. |
Commands
One thing common to all Displayables is the ability to create and display commands to the user and subsequently fire events relating to these commands to a nominated command listener. Remember that a command is an abstract concept; it's up to the MID to turn it into a reality. As you saw in previous examples, commands are objects inserted into a Screen. For example:
goCommand = new Command("Cancel", Command.SCREEN, 1);
myForm.addCommand(goCommand);
NOTE
Note
For a full working example of using commands, check out the CommandListenTest.java source file on the CD.
This code creates a new command with the label Cancel and a type of Command.SCREEN.
There's a slightly better way to do this, though. You can use the command type to specify a system-dependant default action. In other words, you can have the UI decide the best way to display a typical command. Cancel is a good example of this; by specifying a command type of Command.CANCEL, you can leave it up to the UI to use its typical label. For example:
goCommand = new Command("Cancel", Command.CANCEL, 1);Table 5.17 shows a full list of the command types.
|
Type |
Description |
|---|---|
|
Command Types | |
|
BACK |
Returns to the previous screen. |
|
OK |
Provides a standard way to say "yup!" |
|
CANCEL |
Provides a standard way to say "nuh!" |
|
EXIT |
Provides a standard application quit. |
|
HELP |
Asks for help. |
|
ITEM |
Hints to the UI that this command relates to an Item. |
|
SCREEN |
Indicates that the command is something you just made up. |
|
STOP |
Provides a standard way to issue a stop signal. |
|
Methods | |
|
Command(String label, int commandType, int priority) |
Constructs a new command. |
|
int getCommandType() |
Returns the type of the command. |
|
String getLabel() |
Gets the label. |
|
int getPriority() |
Gets the priority. |
The other parameter used in the construction of a command is the priority. The UI uses the priority as an indication of the order in which you would like commands displayed. Basically, the lower the number, the higher it is in the list.
Command Listeners
Having the user select a command is wonderful, but it's not going to do a lot unless you see that event and then do something about it. You can do this using command listeners.
To create a listener, you need to implement theyou guessed itCommandListener interface. Thankfully it's an easy one to use. Here's an example of a simple MIDlet that listens for a command:
import javax.microedition.midlet.*;
import javax.microedition.lcdui.*;

/**
 * A MIDlet that demonstrates how to use the CommandListener interface in
 * order to capture command events when triggerd by the user (such as when they
 * hit OK on a command item).
 *
 * @author Martin J. Wells
 */
public class CommandListenTest extends MIDlet implements CommandListener
{
   private Form form;          // form we'll display
   private Command quit;       // quit command added to form


   /**
    * Constructor for the MIDlet which instantiates the Form object then
    * populates it with a string and a "Quit" command.
    */
   public CommandListenTest()
   {
      // Setup the UI
      form = new Form("Listener");
      form.append("Do you wish to quit?");
      form.setCommandListener(this);

      // Create and add two commands to change the MIDlet state
      quit = new Command("Quit", Command.EXIT, 1);
      form.addCommand(quit);
   }

   /**
    * Called by the Application Manager when the MIDlet is starting or resuming
    * after being paused. In this example it acquires the current Display object
    * and uses it to set the Form object created in the MIDlet constructor as
    * the active Screen to display.
    * @throws MIDletStateChangeException
    */
   protected void startApp() throws MIDletStateChangeException
   {
      Display.getDisplay(this).setCurrent(form);
   }

   /**
    * Called by the MID's Application Manager to pause the MIDlet. A good
    * example of this is when the user receives an incoming phone call whilst
    * playing your game. When they're done the Application Manager will call
    * startApp to resume. For this example we don't need to do anything.
    */
   protected void pauseApp()
   {
   }

   /**
    * Called by the MID's Application Manager when the MIDlet is about to
    * be destroyed (removed from memory). You should take this as an opportunity
    * to clear up any resources and save the game.  For this example we don't
    * need to do anything.
    * @param unconditional if false you have the option of throwing a
    * MIDletStateChangeException to abort the destruction process.
    * @throws MIDletStateChangeException
    */
   protected void destroyApp(boolean unconditional) throws MIDletStateChangeException
   {
   }

   /**
    * The CommandListener interface method called when the user executes
    * a Command, in this case it can only be the quit command we created in the
    * constructor and added to the Form.
    * @param command
    * @param displayable
    */
   public void commandAction(Command command, Displayable displayable)
   {
      // output the command on the console
      System.out.println("commandAction(" + command + ", " + displayable +
                           ") called.");
      try
      {
         // compare the command object passed in to our quit command
         if (command == quit)
         {
            destroyApp(true);
            notifyDestroyed();
         }
      }

      catch (MIDletStateChangeException me)
      {
         System.out.println(me + " caught.");
      }
   }
}
The first part of setting up a command listener is, of course, creating the listener class. For simplicity, your sample MIDlet class serves as both the application and the listener for commands. To do this, you implement the CommandListener interface using the following code:
public class CommandListenTest extends MIDlet implements CommandListener
To comply with this interface, you implement the commandAction method.
public void commandAction(Command command, Displayable displayable)
Inside this method, you simply check which command object triggered the call and react accordingly.
         if (command == quit)
         {
            destroyApp(true);
            notifyDestroyed();
}|
Method |
Description |
|---|---|
|
void commandAction (Command c, Displayable d) |
The method called with Command c is executed on Displayable d. |
High-Level UI
As described previously, the high-level UI provides an abstract interface to the MID. You'll get a lot of functionality by using it, without having to worry about the mechanics of handling the variety of devices on the market.
You use the high-level API by creating components, adding them to the screen, and then reacting to their results. All high-level UI components fall into two broad categories screens and items.
NOTE
Why Not AWT?
If you're familiar with Java GUI application development, you may ask why they didn't use the AWT (Abstract Windowing Toolkit) or a subset of it as the basis for the MIDP UI.
According to the MIDP specifications, the reason really comes down to the foundation of the AWT. Being designed for large-screen, general-purpose computers resulted in the following unsuitable characteristics.
Many of the foundation features, such as window management and mouse-operated controls are not appropriate on MIDs.
AWT is based around having some type of pointer device (mouse or pen); when this is removed, the entire design foundation of AWT is compromised.
The design of AWT requires the instantiation and subsequent garbage collection of a large number of objects for some pretty basic operations.
Screens
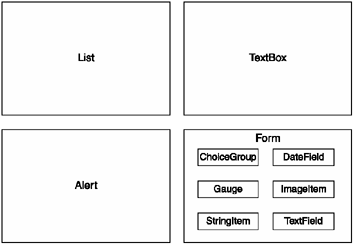
As I covered earlier, screens are full class components that take up the entire interface (input and display). One of those screens, the Form, is special in that it gives you the ability to construct a screen using smaller subcomponents, also known as items. Figure 5.10 provides a breakdown of both the Screens and Form items available in the MIDP.
Figure 5.10. The Form screen can contain item components.
In the next section, you'll look at each of these screen objects. We'll leave the Form screen and its little friends until last.
List
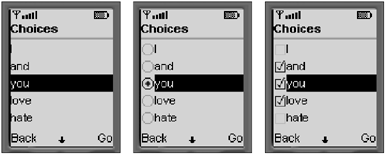
A List (you can see the full API in Table 5.20) is a component that presents the user with a list of choices. (Imagine that!) The class implements the javax.microedition.lcdui.Choice interface. (The ChoiceGroup item also implements this interface.) Table 5.19 lists the three pre-defined choice types, and Figure 5.11 shows an example of these types.
Figure 5.11. The three types of Lists as rendered by the default emulator.
|
Method |
Description |
|---|---|
|
List (String title, int listType) |
Constructs a list using the given title and list type. |
|
List (String title, int listType, String[] stringElements, Image[] imageElements) |
Constructs a list with a predefined set of options and corresponding images. |
|
int append (String stringPart, Image imagePart) |
Adds an element (choice) to the list (as well as an optional image). |
|
void delete (int elementNum) |
Removes an element. |
|
void insert (int elementNum, String stringPart, Image imagePart) |
Inserts an element (string and image) into the list. |
|
void set (int elementNum, String stringPart, Image imagePart) |
Directly sets an element's string and image. |
|
Image getImage (int elementNum) |
Returns the image associated with an element. |
|
String getString (int elementNum) |
Returns the string associated with an element. |
|
boolean isSelected (int elementNum) |
Returns a Boolean indicating whether a particular element is currently selected. |
|
int getSelectedIndex () |
Returns the currently selected element index. |
|
void setSelectedIndex (int elementNum, boolean selected) |
Sets a selection by element index. |
|
int getSelectedFlags (boolean[] selectedArray_return) |
Fills in the current selection choices in a Boolean array. |
|
void setSelectedFlags (boolean[] selectedArray) |
Directly sets the selections based on an array of Booleans. |
|
int size () |
Returns the number of elements in the list. |
|
Type |
Description |
|---|---|
|
IMPLICIT |
Provides a list of choices where selection generates a single event (a list). |
|
EXCLUSIVE |
Provides a list of choices with one selection at a time (radio buttons). |
|
MULTIPLE |
Provides a list of choices for multiple selections (check boxes). |
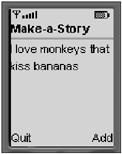
Take a look at the List component in action. In the example code that follows, you'll let the user select new words from a list. Each time the user selects an entry, it will be added to the underlying form. This example also illustrates nicely how a MIDlet switches screens.
import javax.microedition.midlet.*;
import javax.microedition.lcdui.*;

import javax.microedition.midlet.*;
import javax.microedition.lcdui.*;

/**
 * A demonstration of a List screen.
 * @author Martin J. Wells
 */
public class ListTest extends MIDlet implements CommandListener
{
   private Form form;
   private Command quit;
   private Command add;
   private Command back;
   private Command go;
   private List list;

   /**
    * Constructor for the MIDlet which creates a List Screen and appends
    * a bunch of items on the list as well as a Form containing an Add
    * and Quit command.
    */
   public ListTest()
   {
      // Setup the UI
      String[] choices = { "I", "and", "you", "love", "hate",
                             "kiss", "bananas", "monkeys", "that" };

      list = new List("Choices", List.IMPLICIT, choices, null);
      go = new Command("Go", Command.OK, 1);
      back = new Command("Back", Command.BACK, 2);
      list.addCommand(go);
      list.addCommand(back);
      list.setCommandListener(this);
      // build the form
      form = new Form("Make-a-Story");
      add = new Command("Add", Command.SCREEN, 1);
      quit = new Command("Quit", Command.EXIT, 2);
      form.addCommand(add);
      form.addCommand(quit);
      form.setCommandListener(this);
   }

   /**
    * Called by the Application Manager when the MIDlet is starting or resuming
    * after being paused. In this example it acquires the current Display object
    * and uses it to set the Form object created in the MIDlet constructor as
    * the active Screen to display.
    * @throws MIDletStateChangeException

    */
   protected void startApp() throws MIDletStateChangeException
   {
      Display.getDisplay(this).setCurrent(form);
   }

   /**
    * Called by the MID's Application Manager to pause the MIDlet. A good
    * example of this is when the user receives an incoming phone call whilst
    * playing your game. When they're done the Application Manager will call
    * startApp to resume. For this example we don't need to do anything.
    */
   protected void pauseApp()
   {
   }

   /**
    * Called by the MID's Application Manager when the MIDlet is about to
    * be destroyed (removed from memory). You should take this as an opportunity
    * to clear up any resources and save the game. For this example we don't
    * need to do anything.
    * @param unconditional if false you have the option of throwing a
    * MIDletStateChangeException to abort the destruction process.
    * @throws MIDletStateChangeException
    */
   protected void destroyApp(boolean unconditional) throws MIDletStateChangeException
   {
   }

   /**
    * The CommandListener interface method called when the user executes a
    * Command. This method handles the standard quit command as well as an add
    * command which triggers the display to be switched to the list. It then
    * handles commands from the list screen to either select an item or abort.
    * @param command the command that was triggered
    * @param displayable the displayable on which the event occurred
    */
   public void commandAction(Command command, Displayable displayable)
   {
      System.out.println("commandAction(" + command + ", " + displayable +
                           ") called.");
      try
      {
         // form handling
         if (displayable == form)
         {
            if (command == quit)
            {
               destroyApp(true);
               notifyDestroyed();
            }

            if (command == add)
            {
               Display.getDisplay(this).setCurrent(list);
            }
         }

         // list handling
         if (displayable == list)
         {
            if (command == go)
            {
               form.append(list.getString(list.getSelectedIndex()) + " ");
               Display.getDisplay(this).setCurrent(form);
            }

            if (command == back)
               Display.getDisplay(this).setCurrent(form);
         }

      }

      catch (MIDletStateChangeException me)
      {
         System.out.println(me + " caught.");
      }
   }
}
You create the list using the following code within the MIDlet constructor:
      String[] choices = { "I", "and", "you", "love", "hate",
                             "kiss", "bananas", "monkeys", "that" };
      list = new List("Choices", List.IMPLICIT, choices, null);
This creates your List object with a preset list of choices from the array of strings. Since List is a screen, you also add commands to let the user take some action.
      go = new Command("Go", Command.OK, 1);
      back = new Command("Back", Command.BACK, 2);
      list.addCommand(go);
      list.addCommand(back);
      list.setCommandListener(this);
Note that the listener is set to the MIDlet. If you look further down, you'll notice the form screen also sets its listener to the MIDlet. This is perfectly fine because your commandAction method can determine the screen (Displayable, actually) from which a command came.
   public void commandAction(Command command, Displayable displayable)
   {
  ...
         // form handling
         if (displayable == form)
         {
            if (command == quit)
            {
                ...
            }
         }

         // list handling
         if (displayable == list)
         {
            if (command == go)
            {
               form.append(list.getString(list.getSelectedIndex()) + " ");
               ...
            }
NOTE
Note
This is a simple example dealing with a single-choice list. You can use both implicit and exclusive list types without any code change. However, multiple-type lists are a little bit different. You will need code to deal with multiple selections.
The real action here is the call to list.getString(list.getSelectedIndex()). This simply gets the currently selected item from the list. Figure 5.12 shows how it looks when it's running.
Figure 5.12. An example of a List in action.
And that's it! Next time you're out at a nightclub, swagger over to that hot chick at the bar and say, "I can present and select a J2ME LCDUI List any way I want, baby." Trust me; she'll be so impressed she won't know what to say.
TextBox
A TextBox component is the word processor of the micro world! Well, not really. It just lets you enter more than one line of text, but heywhat do you expect here?
The TextBox class has some great features (you can see the API in Table 5.21), however. You can have the player enter multiple lines of text; cut, copy, and paste from a clipboard (even across other components); and filter the data being entered (such as permitting only numbers).
|
Method |
Description |
|---|---|
|
TextBox (String title, String text, int maxSize, int constraints) |
Constructs a new text box. |
|
void delete (int offset, int length) |
Deletes chars from an offset. |
|
int getCaretPosition () |
Returns the current cursor position. |
|
int getChars (char[] data) |
Gets the contents of the TextBox as an array of chars. |
|
int getConstraints () |
Returns the constraints. |
|
int getMaxSize () |
Gets the maximum number of chars that can be stored in this TextBox. |
|
String getString () |
Returns the current contents as a String. |
|
void insert (char[] data, int offset, int length, int position) |
Inserts text into the contents. |
|
void insert (String src, int position) |
Inserts text into the contents. |
|
void setChars (char[] data, int offset, int length) |
Replaces chars with new values. |
|
void setConstraints (int constraints) |
Changes the constraints. |
|
int setMaxSize (int maxSize) |
Changes the maximum size. |
|
void setString (String text) |
Sets the contents to a String. |
|
int size () |
Returns the number of chars used. |
Now I want to jump straight into an example of a TextBox in action, and then I'll walk you through the code.
import javax.microedition.midlet.*;
import javax.microedition.lcdui.*;

public class TextBoxTest extends MIDlet implements CommandListener
{
   private TextBox textBox;
   private Alert alert;
   private Command quit;
   private Command go;

   public TextBoxTest()
   {
      // Set up the UI
      textBox = new TextBox("Enter Thy Name", "Sir ", 20, TextField.ANY);
      go = new Command("Go", Command.SCREEN, 1);
      quit = new Command("Quit", Command.EXIT, 2);
      textBox.addCommand(go);
      textBox.addCommand(quit);
      textBox.setCommandListener(this);
   }

   protected void startApp() throws MIDletStateChangeException
   {
      Display.getDisplay(this).setCurrent(textBox);
   }

   protected void pauseApp()
   {
   }

   protected void destroyApp(boolean unconditional) throws MIDletStateChangeException
   {
   }

   public void commandAction(Command command, Displayable displayable)
   {
      try
      {
         if (command == quit)
         {
            destroyApp(true);
            notifyDestroyed();
         }

         if (command == go)
         {
            alert = new Alert("", "Greetings " + textBox.getString(), null,
AlertType.CONFIRMATION);
            display.setCurrent(alert);
         }

      }

      catch (MIDletStateChangeException me)
      {
         System.out.println(me + " caught.");
      }
   }
}
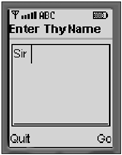
This MIDlet will display a text box on startup, let you enter your name, and return a cute little greeting, as shown in Figure 5.13.
Figure 5.13. A TextBox in action.
The code should be getting rather familiar to you now. The constructor instantiates a new TextBox screen object and then adds quit and go commands.
textBox = new TextBox("Enter Thy Name", "Sir ", 20, TextField.ANY);
go = new Command("Go", Command.SCREEN, 1);
quit = new Command("Quit", Command.EXIT, 2);
textBox.addCommand(go);
textBox.addCommand(quit);
I already covered the rest of the example in previous sections, so I'll just skip to the guts of the resultthe commandAction method handling of the go command.
alert = new Alert("", "Greetings " + textBox.getString(), null, AlertType.CONFIRMATION);
display.setCurrent(alert);
Here you're sneaking a look at the next sectionthe Alert screen. The code just grabs the current contents of the textBox object and displays them as an Alert.
You can also use constraints to restrict the input to the typical data types shown in Table 5.22. These are all pretty self-explanatory, but you should be aware that you can combine the password constraint with other types by using a logical OR. You can then use the CONTRAINT_MASK to strip out any constraint modifiers (such as the password) by using a logical AND.
|
Constraint |
Description |
|---|---|
|
ANY |
Provides no constraints. |
|
EMAILADDR |
Formats an e-mail address. |
|
NUMERIC |
Allows only numbers. |
|
PASSWORD |
Allows a hidden text entry. |
|
PHONENUMBER |
Allows a phone number. |
|
URL |
Allows a URL. |
|
CONSTRAINT_MASK |
Provides a mask constant used to separate constraints. |
Alert
Remember Davros from Dr.Who? No evil ever conjured by Hollywood can top the might of the trundling Dalecslucky they didn't have stairs in the future. Using an MIDP Alert is sort of the same as when Dalecs stop and electronically excrete their "exterminate," but in a completely different and far more boring way.
You can think of an Alert as a very simple dialog box; you use it to display a message (and because an Alert is a screen, it takes over the entire screen). You can see the full API in Table 5.23 and the different types of Alerts in Table 5.24.
|
Method |
Description |
|---|---|
|
Alert (String title) |
Constructs a simple Alert that automatically disappears after a system-defined period of time. |
|
Alert (String title, String alertText, Image alertImage, AlertType alertType) |
Constructs an Alert using a title, message, image, and type. |
|
int getDefaultTimeout () |
Gets the default timeout used by the MID. |
|
Image getImage () |
Gets the Alert's image. |
|
String getString () |
Gets the Alert's string. |
|
int getTimeout () |
Gets the current timeout. |
|
AlertType getType () |
Gets the current type. |
|
void setImage (Image img) |
Sets the image. |
|
void setString (String str) |
Sets the Alert message. |
|
void setTimeout (int time) |
Sets the timeout. |
|
void setType (AlertType type) |
Sets the type. |
|
void addCommand (Command cmd) |
Not available! Calling this will result in an exception. |
|
void setCommandListener (CommandListener l) |
Not available! Calling this will result in an exception. |
|
Type |
Description |
|---|---|
|
ALARM |
Alerts the user to an event for which he has previously requested notification. |
|
CONFIRMATION |
Confirms a user's action. |
|
ERROR |
Indicates that something bad happened. |
|
INFO |
Indicates something informative. |
|
WARNING |
Warns the user of something. |
|
boolean playSound (Display display) |
Plays the sound associated with an Alert without having to actually construct the Alert. |
There are really only two categories of Alertsone that displays for a set period and then kills itself, and one that waits for the user's acknowledgement. (The latter type is also known as a modal Alert.)
Creating an Alert is a relatively simple process. For example, in the previous section you created an alert when the user entered his name.
alert = new Alert("", "Greetings " + textBox.getString(), null, AlertType.CONFIRMATION);
display.setCurrent(alert);
This is a typical use for an Alertto display a message to the user and then resume operations on another Displayable. Alerts are a little bit different from regular Displayables, however. First, they can't be the only items in your MIDlet. An Alert must be associated with a Displayable from which it was spawned (the default); otherwise, you have to identify specifically a Displayable onto which the Alert should fall back after the user has dismissed it.
Also, Alerts do not have commands, even though they are subclasses of Screen, which in turn is a subclass of Displayable. The methods relating to commandsnamely addCommand, removeCommand, and setCommandListener, will trigger exceptions if called.
For an example of an Alert in action, see the previous "TextBox" section.
Forms and Items
A Form is a Screen that can contain one or more of the following components derived from the Item classStringItem, ImageItem, TextField, ChoiceGroup, DateField, and Gauge.
To use a Form, you simply construct it like any other Screen, and then use the append, delete, insert, and set methods to manipulate the Items, images, and strings. Then it's up to the MID to determine exactly how items are laid out within the Form. (Typically they are laid out in a simple vertical list.)
NOTE
Note
You can also add simple images and strings to a Form. However, these are just convenience methods that automatically construct the equivalent Item for you. For example:
form.append("hello")
Is actually identical to:
form.append(new StringItem("hello"))
This reinforces an important point: Only Items can exist in a Form.
Table 5.25 lists the full API for the Form class.
|
Method |
Description |
|---|---|
|
Form (String title) |
Constructs a form with a given title. |
|
Form (String title, Item[] items) |
Constructs a form with a title, and that is pre-populated with an array of items. |
|
int append (Image img) |
Appends an image. |
|
int append (Item item) |
Appends an Item class object. |
|
int append (String str) |
Appends a string. |
|
void delete (int itemNum) |
Removes an item by index number. |
|
Item get (int itemNum) |
Returns an item by index number. |
|
void insert (int itemNum, Item item) |
Inserts a new item at a certain index. |
|
void set (int itemNum, Item item) |
Sets an item at a particular index. |
|
void setItemStateListener (ItemStateListener iListener) |
Sets a listener for changes in item states. |
|
int size () |
Returns the number of items in the form. |
In previous examples, you saw some simple uses for Forms. For example, you might remember this usage:
form = new Form("Make-a-Story");
...
form.append(list.getString(list.getSelectedIndex()) + " ");
This simply constructs a new form and then appends a string to it.
Nothing too complicated, as far as I know. The fun stuff really starts when you let Items on the dance floor. As I've previously mentioned, there are six Items available (StringItem, ImageItem, TextField, ChoiceGroup, DateField, and Gauge). You can arbitrarily construct these and add them to a form. The trick to using Items lies in how you subsequently interact with them.
Items have their own event-handling mechanism that is quite different from the command structure used by screens. Each item can register an ItemStateListener (you can see the interface in Table 5.26) that will trigger a method call whenyou guessed itthe state of the item changes. Take a look at an example.import javax.microedition.midlet.*;
|
Method |
Description |
|---|---|
|
void itemStateChanged (Item item) |
Called when an Item's state changes. |
import javax.microedition.lcdui.*;

import javax.microedition.midlet.*;
import javax.microedition.lcdui.*;

/**
 * A demonstration of a TextField.
 * @author Martin J. Wells
 */
public class TextFieldTest extends MIDlet implements CommandListener,
         ItemStateListener
{
   private Form form;
   private TextField textFieldItem;
   private Command quit;

   /**
    * MIDlet constructor that creates a form and then adds in a TextField item
    * and a quit command.
    */
   public TextFieldTest()
   {
      // Construct a form.
      form = new Form("Text Field Test");

      // Construct the textfield item and a quit command
      textFieldItem = new TextField("Enter text:", "", 10, TextField.ANY);
      quit = new Command("Quit", Command.EXIT, 2);

      // Add everything to the form.
      form.addCommand(quit);
      form.append(textFieldItem);

      // And register us as the listening for both commands and item state
      // changes.
      form.setCommandListener(this);
      form.setItemStateListener(this);
   }

   /**
    * Called by the Application Manager when the MIDlet is starting or resuming
    * after being paused. In this example it acquires the current Display object
    * and uses it to set the Form object created in the MIDlet constructor as
    * the active Screen to display.
    * @throws MIDletStateChangeException
    */
   protected void startApp() throws MIDletStateChangeException
   {
      Display.getDisplay(this).setCurrent(form);
   }

   /**
    * Called by the MID's Application Manager to pause the MIDlet. A good
    * example of this is when the user receives an incoming phone call whilst
    * playing your game. When they're done the Application Manager will call
    * startApp to resume. For this example we don't need to do anything.
    */
   protected void pauseApp()
   {
   }

   /**
    * Called by the MID's Application Manager when the MIDlet is about to
    * be destroyed (removed from memory). You should take this as an opportunity
    * to clear up any resources and save the game. For this example we don't
    * need to do anything.
    * @param unconditional if false you have the option of throwing a
    * MIDletStateChangeException to abort the destruction process.
    * @throws MIDletStateChangeException
    */
   protected void destroyApp(boolean unconditional) throws MIDletStateChangeException
   {
   }

   /**
    * This method is called as a result of the item's state be changed by the
    * user (ie. they entered some text). After checking we have the right item
    * we then popup a little alert acknowledging the event.
    * @param item
    */
   public void itemStateChanged(Item item)
   {
      System.out.println("item state changed for " + item);
      if (item == textFieldItem)
      {
         Display.getDisplay(this).setCurrent(
                  new Alert("", "You said  " + textFieldItem.getString(),
                             null, AlertType.INFO));
     }
   }

   /**
    * The CommandListener interface method called when the user executes a
    * Command, in this case it can only be the quit command we created in the
    * constructor and added to the Form.
    * @param command the command that was triggered
    * @param displayable the displayable on which the event occurred
    */
   public void commandAction(Command command, Displayable displayable)
   {
      try
      {
         if (command == quit)
         {
            destroyApp(true);
            notifyDestroyed();
         }
      }

      catch (MIDletStateChangeException me)
      {
         System.out.println(me + " caught.");
      }
   }
}
First you'll notice the addition of the ItemStateListener in the class's implements list. This is required to set your MIDlet to be a receiver of these events. (It's essentially the same as implementing the command listener.)
To comply with this interface, you then implement the method.
public void itemStateChanged(Item item)
This method is subsequently called when the user changes the state of the Item's value. And unlike what you'd expect from something like a Windows UI, it really is that simple.
NOTE
Note
An Item cannot appear on more than one form. Doing so will result in an InvalidStateException being thrown.
In the next sections, you'll take a quick look at all of the available Items, including any idiosyncrasies they might have.
StringItem
A StringItem lets you add a simple text message to a form. It doesn't do much, reallythe user can't edit the text, so you won't see any events. Table 5.27 lists the available methods.
|
Method |
Description |
|---|---|
|
StringItem (String label, String text) |
Constructs a new StringItem object using the supplied label and text. |
|
String getText () |
Gets the current text. |
|
void setText (java.lang.String text) |
Sets the text. |
There are two ways to add a StringItem to a form. The first method is the most obvious.
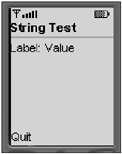
StringItem text = new StringItem("Label:", "Value");
form.append(text);
Figure 5.14 shows this StringItem in operation.
Figure 5.14. A StringItem in action.
As an alternative, you can also use
form.append("string");The append method will automatically construct a new StringItem object using the string you pass it. If you don't plan to change the string (or its label) after you add it to the form, I'd recommend using this shortcut. However, if you really want, you can gain access to the StringItem by using the Index integer returned by the method. For example:
int stringItemIndex = form.append("string");
StringItem stringItem = form.get(stringItemIndex);
ImageItem and Image
ImageItem is similar to StringItem, except that it obviously lets you display images, rather than strings. However, in addition to simply containing an image, the ImageItem class provides tools to lay out where the image will appear on the screen.
Looking at the details of the ImageItem API in Table 5.28, you can see things are relatively simple. There are three essential functionschange the image, change the layout, or change the alternative text.
|
Method |
Description |
|---|---|
|
ImageItem (java.lang.String label, Image img, int layout, String altText) |
Constructs a new ImageItem. |
|
Image getImage () |
Gets the image associated with this Item. |
|
void setImage (Image img) |
Changes the image. |
|
int getLayout () |
Gets the current layout for the Item. |
|
void setLayout (int layout) |
Changes the layout. |
|
String getAltText () |
Gets the text to be displayed if the image could not be rendered on the device. |
|
void setAltText (java.lang.String text) |
Changes the alternative text. |
You use a mixture of double-byte (int) values to control image layout. (Table 5.29 displays the full list of the preset values.) You should note that the first four values are all on the right side of the double-byte values, so you can't mix them. You can, however, combine the two NEWLINE layout values with the four primary controls. For example, the following lines are not valid:
|
Method |
Description |
|---|---|
|
Mutually Exclusive | |
|
LAYOUT_DEFAULT |
Use the device implementation's default alignment. |
|
LAYOUT_CENTER |
Centers the image. |
|
LAYOUT_RIGHT |
Right-aligns the image. |
|
LAYOUT_LEFT |
Left-aligns the image. |
|
Modifiers (Can be mixed with the modifiers above) | |
|
LAYOUT_NEWLINE_AFTER |
Adds a line break after displaying the image. |
|
LAYOUT_NEWLINE_BEFORE |
Adds a line break before displaying the image. |
// not a valid construct
ImageItem.LAYOUT_RIGHT | ImageItem.LAYOUT_CENTER
Not that you'd ever really want to do that, right? You can, however, do the following:
// valid construct
ImageItem.LAYOUT_NEWLINE_BEFORE | ImageItem.LAYOUT_RIGHT |
ImageItem.LAYOUT_NEWLINE_AFTER
The other attribute you can set on an ImageItem is the alternative text. This string will be displayed in place of the image if for some reason the MID couldn't render the image perhaps due to limited display capabilities, insufficient space, or just because you looked at the MID the wrong way during lunch. This also applies to the layout controls. The MID will happily take your advice on how to do things, but in the end it's up to the MID to make it happen (in its own way).
Before you move on to an example of the ImageItem in action, I need to show you how to actually create an image.
The Image class (Table 5.30 shows the available methods) encapsulates an in-memory graphical image that exists independent of the display. Images are subsequently rendered to the display through an ImageItem, ChoiceGroup, List, or Alert.
|
Method |
Description |
|---|---|
|
static Image createImage (byte[] imageData, int imageOffset, int imageLength) |
Creates an immutable image from a byte array in PNG format. |
|
static Image createImage (Image source) |
Creates an immutable image from another image. |
|
static Image createImage (int width, int height) |
Creates a mutable image buffer of a set width and height. |
|
static Image createImage (java.lang.String name) |
Creates an immutable image from a PNG resource file. |
|
Graphics getGraphics () |
Gets a graphics object for drawing on this image. |
|
int getHeight () |
Gets the image's height. |
|
int getWidth () |
Gets the image's width. |
|
boolean isMutable () |
Determines whether the image is mutable. |
Images come in two formsimmutable and mutable. An immutable image represents the static resource from which it was created (such as from a file stored in your JAR), whereas a mutable image can be changed through the low-level graphics system. Just to confuse you a little (because I'm that kind of guy), you can convert a mutable image into an immutable image, but not vice versa. You'll explore mutable images more when you look at the low-level UI. I'll even show you how to create a mutable image from an immutable one.
Looking at the Image API, you'll notice there are no constructors, only factory methods. To create an image, you need to use one of these create methods.
PNG is the only image-file format available. It is a compact, flexible, no-loss format most graphical applications will output happily for you. The following sample MIDlet creates an immutable image from a PNG file, and then adds it to a form through an ImageItem object.
NOTE
Note
This example references the image file alienhead.png. You can obtain this from the CD in Chapter 5 source directory or alternatively replace the file with a PNG of your choice and then change the filename within the source. To work, the image file must be in the same directory as the MIDlet class file.
NOTE
Tip
You can create a PNG image file using most popular graphics applications (such as Adobe Photoshop). For more information check out Chapter 9, "The Graphics".
import javax.microedition.midlet.*;
import javax.microedition.lcdui.*;
import java.io.IOException;

/**
 * An example MIDlet that shows how to use an ImageItem
 *
 * @author Martin J. Wells
 */
public class ImageItemTest extends MIDlet implements CommandListener
{
   private Form form;
   private ImageItem imageItem;
   private Command quit;

   /**
    * Constructs the MIDlet by creating a Form object and then populating it
    * with an ImageItem and a quit command.
    */
   public ImageItemTest()
   {
      form = new Form("ImageItem Test");

      Image alienHeadImage = null;
      try
      {
         // Construct the imageitem item and a quit command
         alienHeadImage = Image.createImage("/alienhead.png");
      }
      catch(IOException ioe)
      {
         form.append("unable to load image");
      }

      // construct the image item using our alien head image and append it
      // to the form
      imageItem = new ImageItem(null, alienHeadImage, ImageItem.LAYOUT_RIGHT,
                                  null);
      form.append(imageItem);

      quit = new Command("Quit", Command.EXIT, 2);
      form.addCommand(quit);

      form.setCommandListener(this);
   }

   /**
    * Called by the Application Manager when the MIDlet is starting or resuming
    * after being paused. In this example it acquires the current Display object
    * and uses it to set the Form object created in the MIDlet constructor as
    * the active Screen to display.
    * @throws MIDletStateChangeException
    */
   protected void startApp() throws MIDletStateChangeException
   {
      Display.getDisplay(this).setCurrent(form);
   }

   /**
    * Called by the MID's Application Manager to pause the MIDlet. A good
    * example of this is when the user receives an incoming phone call whilst
    * playing your game. When they're done the Application Manager will call
    * startApp to resume. For this example we don't need to do anything.
    */
   protected void pauseApp()
   {
   }

   /**
    * Called by the MID's Application Manager when the MIDlet is about to
    * be destroyed (removed from memory). You should take this as an opportunity
    * to clear up any resources and save the game. For this example we don't
    * need to do anything.
    * @param unconditional if false you have the option of throwing a
    * MIDletStateChangeException to abort the destruction process.
    * @throws MIDletStateChangeException
    */
   protected void destroyApp(boolean unconditional) throws MIDletStateChangeException
   {
   }
   /**
    * The CommandListener interface method called when the user executes a
    * Command, in this case it can only be the quit command we created in the
    * constructor and added to the Form.
    * @param command
    * @param displayable
    */
   public void commandAction(Command command, Displayable displayable)
   {
      try
      {
         if (command == quit)
         {
            destroyApp(true);
            notifyDestroyed();
         }
      }

      catch (MIDletStateChangeException me)
      {
         System.out.println(me + " caught.");
      }
   }
}
TextField
A TextField is a simple item for capturing text from the user. It's quite similar to its bigger screen-based cousin, TextBox. The differences really come down to TextField being a subclass of Item, and therefore being embeddable within a form. For example:
form.append(new TextField("Password:", "", 15, TextField.PASSWORD));When used in a MIDlet, this field appears much like Figure 5.15.
Figure 5.15. A TextField Item in action.
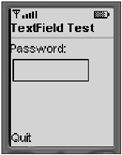
For more information on using the features of a TextField, refer to the "TextBox" section. Table 5.31 lists all the methods available.
|
Method |
Description |
|---|---|
|
TextField (String label, String text, int maxSize, int constraints) |
Constructs a new TextField. |
|
int getConstraints () |
Gets the constraints. |
|
void setConstraints (int constraints) |
Changes the constraints. |
|
void insert (char[] data, int offset, int length, int position) |
Inserts characters into the field. |
|
void insert (String src, int position) |
Inserts a string into the field. |
|
void delete (int offset, int length) |
Removes characters from the field. |
|
int getCaretPosition () |
Retrieves the current cursor position. |
|
int getChars (char[] data) |
Gets the current contents of the field as a char array. |
|
void setChars (char[] data, int offset, int length) |
Sets the field using the contents of a char array. |
|
void setString (java.lang.String text) |
Sets the field using a string value. |
|
String getString () |
Gets the current contents of the field as a string. |
|
int getMaxSize () |
Gets the maximum size of the field. |
|
int setMaxSize (int maxSize) |
Changes the maximum size of the field. |
|
int size () |
Gets the current number of characters in the field. |
ChoiceGroup
ChoiceGroup is the other Item that has a big brother Screen equivalent (List) that you've already covered. Because you've been over most of the territory already, I'll just talk about the differences between ChoiceGroup and List.
Of course, the foremost difference is that one is a Screen class object and the other ChoiceGroupis a Form-embeddable Item class. In addition, unlike in a List, you cannot use the IMPLICIT control type because you don't have any access to the command events.
You might have wondered about the practical differences between the IMPLICIT and EXCLUSIVE choice types. Typically, you'll find that IMPLICIT is for single-selection command Lists, and EXCLUSIVE is for single-selection ChoiceGroups. Both ChoiceGroup and List support the MULTIPLE choice type.
Table 5.32 lists all the methods available in the ChoiceGroup class.
|
Method |
Description |
|---|---|
|
ChoiceGroup (String label, int choiceType) |
Constructs a new ChoiceGroup. |
|
ChoiceGroup (String label, int choiceType, String[] stringElements, Image[] imageElements) |
Constructs a ChoiceGroup using a preset list of elements and images. |
|
int append (String stringPart, Image imagePart) |
Appends a choice (and an associated image). |
|
void delete (int elementNum) |
Removes a choice. |
|
Image getImage (int elementNum) |
Returns the image associated with a choice. |
| int getSelectedFlags (boolean[] selectedArray_return) |
Returns the selected choices. (This is only relevant when you are using MULTIPLE.) |
|
int getSelectedIndex () |
Returns the currently selected choice. |
|
String getString (int elementNum) |
Gets the string associated with an element number. |
|
void insert (int elementNum, String stringElement, Image imageElement) |
Inserts a choice. |
|
boolean isSelected (int elementNum) |
Determines whether a choice is selected. |
|
void set (int elementNum, java.lang.String stringPart, Image imagePart) |
Changes a choice. |
|
void setSelectedFlags (boolean[] selectedArray) |
Changes the selected items. |
|
void setSelectedIndex (int elementNum, boolean selected) |
Selects a single entry. |
|
int public int size () |
Returns the number of choices. |
Following is an example of using a ChoiceGroup in the form from the previous example:
form.append(new ChoiceGroup("Choose: ", Choice.MULTIPLE,
                          new String[]{ "one", "two" }, null ));
The output from this (see Figure 5.16) also demonstrates just how different forms are from screens. As you can see, the MID (in this case, the Sun WTK 1.04 emulator) has rendered both the password text field and the choice group on one screen.
Figure 5.16. An example of a Form containing multiple Items, including a ChoiceGroup.
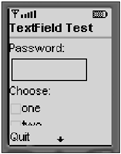
DateField
A DateField (see Table 5.34 for the API) is one of those things you'll completely ignore until the day you need the player to enter a date (although this rarely occurs in games). I'll give you a quick rundown on using the DateField, just in case.
|
Method |
Description |
|---|---|
|
DateField (String label, int mode) |
Constructs a new DateField using the specified label and mode. |
|
DateField (String label, int mode, TimeZone timeZone) |
Constructs a new DateField using the specified label, mode, and TimeZone. |
|
Date getDate () |
Retrieves the date set in the field. |
|
int getInputMode () |
Returns the field's mode. |
|
void setDate (Date date) |
Changes the date value. |
|
void setInputMode (int mode) |
Changes the input mode. |
As detailed in Table 5.33, you can use three types of DateFieldsone for entering just a calendar date, one for only the time, and one for both. However, this practically equates to only two entry typesdate and time. Figure 5.17 presents an example of both types in action.
Figure 5.17. Examples of different DateField types.
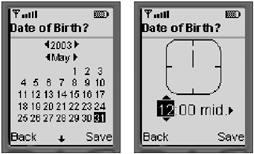
|
Type |
Description |
|---|---|
|
DATE |
Allows you to enter the calendar date. |
|
DATE_TIME |
Allows you to enter both a date and a time. |
|
TIME |
Allows you to enter just the time. |
In the case of the DATETIME type, the MID generally will provide a way to access both of these types. Figure 5.18 presents an example of this.
Figure 5.18. An example of a DateField of type DATE_TIME.
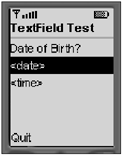
You use the DateField item just like you did in the previous examples.
form.append(new DateField("Date of Birth?", DateField.DATE_TIME));Gauge
A Gauge (see Table 5.35 for the list of methods) item lets you display graphically to the user the relative position of something. In other words, it's a cute little bar that shows where you are.
|
Methods |
Description |
|---|---|
|
Gauge (String label, boolean interactive, int maxValue, int initialValue) |
Constructs a Gauge. |
|
int getMaxValue () |
Gets the maximum value. |
|
void setMaxValue (int maxValue) |
Sets the maximum value. |
|
int getValue () |
Gets the current value. |
|
void setValue (int value) |
Sets the current value. |
|
boolean isInteractive () |
Returns a Boolean indicating whether this Gauge is interactive. |
A Gauge is optionally interactive, meaning that it will act like an input control. A good example of this is the volume gauge on most mobile phones. In this case, you can slide the gauge value interactively between the minimum and maximum values. Figure 5.19 shows an example form containing both an interactive and a non-interactive Gauge (top and bottom, respectively).
Figure 5.19. Examples of Gauge in action.
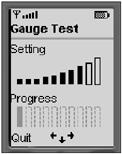
As you can see, the MID can draw interactive Gauges differently than non-interactive ones. The code to create these Gauges is
form.append(new Gauge("Setting", true, 10, 1));
form.append(new Gauge("Progress", false, 10, 1));
You can see that in both examples I've used a maximum value of 10 and a starting (default) value of 1. These values could be pretty much any mix; for example, you could have a maximum of 500 and a starting value of 250. However, keep in mind that every value in this range is represented (not just the number of bars that happen to be displayed), so with numbers that high you'll be hitting the arrow for quite a while before you visually move even one bar.
Low-Level UI
Let me tell you a little about myself. I live in a mansion with endless servants to do my every bidding, 24 hours a day. And I do mean every biddingI don't have to do anything, ever. No need to clean, dress, or even feed myself. They take care of it all.
If I want to go for a swim in my Olympic-sized, gold-plated, chocolate-milk-filled pool, I have a servant hold my body in place while other servants flap my arms and legs about in a swimming motion. Life's tough. Sure, I have to ask for things to be done, but I'm happy to leave the details to my servants.
All right, this story isn't about me (no …really). In fact, it's actually (metaphorically, at least), about your MIDlet. Up until now, it has led a princely life in which things are pretty much all done for it. It just makes requests to create elements on the user interface, and the butleroops, MIDtakes care of getting the job done.
Unfortunately, this is also boring as hell. You have no real power to do things your way, and that just isn't practical for game development. The low-level UI provides a toolkit to move and draw graphics, render fonts, and capture direct key eventsjust what you need to make that chocolate-milk-swimming-pool racing game.
Canvas
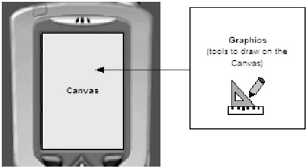
Two classes really make up the low-level UI engineCanvas (see Table 5.36 for the API) and Graphics (see Table 5.37 for the API). The Canvas is a Displayable object (just like the high-level UI's screen object) that serves as the target for all your graphical activities. The Graphics object (or to be more accurate, the context) is your palette of tools with which to draw. You can see this relationship in Figure 5.20.
Figure 5.20. Use a Graphics object to draw on a Canvas.
|
Method |
Description |
|---|---|
|
General Methods | |
|
int getGameAction (int keyCode) |
Gets the game action associated with a key code. |
|
int getKeyCode (int gameAction) |
Gets the key code associated with a game action. |
|
String getKeyName (int keyCode) |
Gets the name of a device key (identified by a key code). |
|
int getWidth () |
Returns the display's width. |
|
int getHeight () |
Returns the display's height. |
|
boolean hasPointerEvents () |
Determines whether the device supports pointer press and release events. |
|
boolean hasPointerMotionEvents () |
Determines whether the device supports dragging events. |
|
boolean hasRepeatEvents () |
Checks whether the device will return multiple events if a key is held down. |
|
boolean isDoubleBuffered () |
Gets whether the device graphics are double buffered. |
|
Event Response Methods | |
|
abstract void paint (Graphics g) |
Called when the canvas needs repainting. |
|
void hideNotify () |
Called when the canvas has been hidden. |
|
void showNotify () |
Called when you are back in the action. |
|
void keyPressed (int keyCode) |
Called when a key has been pressed. |
|
void keyRepeated (int keyCode) |
Called when a key begins repeating (when it's held down). |
|
void keyReleased (int keyCode) |
Called when a key has stopped repeating (when the key is no longer held down). |
|
void pointerDragged (int x, int y) |
Called when the pointer is dragged. |
|
void pointerPressed (int x, int y) |
Called when the pointer is pressed. |
|
void pointerReleased (int x, int y) |
Called when the pointer is released. |
|
void repaint() |
Requests a repaint of the Canvas. |
|
void repaint(int x, int y, int width, int height) |
Requests a repaint of only a specified portion of the Canvas. |
|
void serviceRepaints() |
Requests that any pending repaint requests be handled as soon as possible. |
|
Method |
Description |
|---|---|
|
Color | |
|
int getColor () |
Gets the currently set color. |
|
void setColor (int RGB) |
Changes the current drawing color. |
|
void setColor (int red, int green, int blue) |
Changes the current drawing color. |
|
int getRedComponent () |
Gets the red component (0255) of the current drawing color. |
|
int getGreenComponent () |
Gets the green component (0255) of the current drawing color. |
|
int getBlueComponent () |
Gets the blue component (0255) of the current drawing color. |
|
void setGrayScale (int value) |
Sets the current grayscale drawing color. |
|
int getGrayScale () |
Gets the current grayscale drawing color. |
|
Coordinates | |
|
int getTranslateX () |
Returns the current translated X origin. |
|
int getTranslateY () |
Returns the current translated Y origin. |
|
void translate (int x, int y) |
Translates the origin in the current graphics context. |
|
Images and Clipping | |
|
void clipRect (int x, int y, int width, int height) |
Sets the current clipping rectangle. |
|
int getClipHeight () |
Gets the current clipping-rectangle height. |
|
int getClipWidth () |
Gets the current clipping-rectangle width. |
|
int getClipX () |
Gets the current X offset of the clipping rectangle. |
|
int getClipY () |
Gets the current Y offset of the clipping rectangle. |
|
void setClip (int x, int y, int width, int height) |
Intersects the current clipping rectangle with the one passed to the method. |
|
2D Geometry | |
|
void drawArc (int x, int y, int width, int height, int startAngle, int arcAngle) |
Draws an arc. |
|
void drawImage (Image img, int x, int y, int anchor) |
Renders an image at a certain position. |
|
void drawLine (int x1, int y1, int x2, int y2) |
Draws a line. |
|
void drawRect (int x, int y, int width, int height) |
Draws a rectangle. |
|
void drawRoundRect (int x, int y, int width, int height, int arcWidth, int arcHeight) |
Draws a rounded rectangle. |
|
void fillArc (int x, int y, int width, int height, int startAngle, int arcAngle) |
Draws a filled arc. |
|
void fillRect (int x, int y, int width, int height) |
Draws a filled rectangle. |
|
void fillRoundRect (int x, int y, int width, int height, int arcWidth, int arcHeight) |
Draws a filled, rounded rectangle. |
|
int getStrokeStyle () |
Gets the current stroke style. |
|
void setStrokeStyle (int style) |
Sets the current stroke style. |
|
Strings and Fonts | |
|
void drawString (String str, int x, int y, int anchor) |
Renders a String. |
|
void drawSubstring (String str, int offset, int len, int x, int y, int anchor) |
Renders only part of a String. |
|
void drawChar (char character, int x, int y, int anchor) |
Draws a single character. |
|
void drawChars (char[] data, int offset, int length, int x, int y, int anchor) |
Draws an array of characters. |
|
Font getFont () |
Gets the current drawing font. |
|
void setFont (Font font) |
Sets the current drawing font. |
You'll explore the details of the Graphics object in a little while. First, take a look at how you create and then display a Canvas Displayable.
You don't create a Canvas like you create other Displayable objects. It serves as a base class from which you derive your own custom drawing object. The Canvas base class provides all the tools, and you need to add the content. The only method you need to implement in your derived Canvas class is
protected void paint(Graphics graphics)
This method is responsible for rendering or drawing the Canvas control on the screen.
In the following example, you'll subclass the Canvas object, override the paint method, and then create a work of art involving some rectangles and more shades of gray than a retirement home.
import javax.microedition.midlet.*;
import javax.microedition.lcdui.*;
import java.util.Random;
/**
 * A MIDlet that demonstrates the basic use of the Canvas class by loading
 * and drawing an image. Note that for this to work you must have the
 * alienhead.png file in the directory where you execute the class.
 *
 * @author Martin J. Wells
 */
public class CanvasTest extends MIDlet implements CommandListener
{
   private MyCanvas myCanvas;
   private Command quit;
   private Command redraw;

   /**
    * An inner class used to customize a Canvas for our needs.
    */
   class MyCanvas extends Canvas
   {
      private Random randomizer = new Random();

      /**
       * @return A simple random range finder (returns a random value between
       * an upper and lower range)
       */
      private int getRand(int min, int max)
      {
         int r = Math.abs(randomizer.nextInt());
         return (r % (max - min)) + min;
      }

      /**
       * Called by the Application Manager when the Canvas needs repainting.
       * This implementation uses the drawImage method to render the previously
       * loaded alienHeadImage.
       * @param graphics The graphics context for this Canvas
       */
      protected void paint(Graphics graphics)
      {
         for (int i=10; i > 0; i--)
         {
            graphics.setGrayScale(getRand(1,254));
            graphics.fillRect(0, 0, i*(getWidth()/10), i*(getHeight()/10));
        }
      }
   }

   /**
    * Constructor for the MIDlet that firstly loads up a PNG image from a file
    * then constructs the instance of our MyCanvas class and adds a quit and
    * redraw command and sets this MIDlet to be the listener for Command events.
    */
   public CanvasTest()
   {
      // Construct the canvas
      myCanvas = new MyCanvas();

      // we still need a way to quit
      quit = new Command("Quit", Command.EXIT, 2);
      myCanvas.addCommand(quit);

      // and a redraw trigger
      redraw = new Command("Redraw", Command.SCREEN, 1);
      myCanvas.addCommand(redraw);

      myCanvas.setCommandListener(this);
   }

   /**
    * Called by the Application Manager when the MIDlet is starting or resuming
    * after being paused. In this example it acquires the current Display object
    * and uses it to set the Canvas object created in the MIDlet constructor as
    * the active Screen to display.
    * @throws MIDletStateChangeException
    */
   protected void startApp() throws MIDletStateChangeException
   {
      Display.getDisplay(this).setCurrent(myCanvas);
   }

   /**
    * Called by the MID's Application Manager to pause the MIDlet. A good
    * example of this is when the user receives an incoming phone call whilst
    * playing your game. When they're done the Application Manager will call
    * startApp to resume. For this example we don't need to do anything.
    */
   protected void pauseApp()
   {
   }

   /**
    * Called by the MID's Application Manager when the MIDlet is about to
    * be destroyed (removed from memory). You should take this as an opportunity
    * to clear up any resources and save the game. For this example we don't
    * need to do anything.
    * @param unconditional if false you have the option of throwing a
    * MIDletStateChangeException to abort the destruction process.
    * @throws MIDletStateChangeException
    */
   protected void destroyApp(boolean unconditional) throws MIDletStateChangeException
   {
   }

   /**
    * The CommandListener interface method called when the user executes
    * a Command, in this case it can be the quit command, in which case we exit
    * or the redraw command, in which case we call MyCanvas repaint method which
    * will in turn cause it to be redrawn through the implement paint method.
    * @param command
    * @param displayable
    */
   public void commandAction(Command command, Displayable displayable)
   {
      try
      {
         if (command == redraw)
         {
            // ask the canvas to redraw itself
            myCanvas.repaint();
         }

         if (command == quit)
         {
            destroyApp(true);
            notifyDestroyed();
         }
      }
      catch (MIDletStateChangeException me)
      {
         System.out.println(me + " caught.");
      }
   }
}
This MIDlet will look something like Figure 5.21 when it is run.
Figure 5.21. An example using the low-level API to draw shaded rectangles.
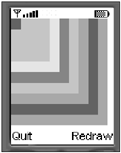
Take a look at how this MIDlet works. You'll notice the addition of the MyCanvas inner class. As you can see, it extends the javax.microedition.lcdui.Canvas abstract base class.
class MyCanvas extends Canvas
{
   …

   protected void paint(Graphics graphics)
   {
      for (int i=10; i > 0; i--)
      {
         graphics.setGrayScale(getRand(1,254));
         graphics.fillRect(0, 0, i*(getWidth()/10), i*(getHeight()/10));
      }
   }
}
Everything happens in the overridden paint method. Using the passed Graphics object, you set a random drawing color (or shade of gray, to be exact), and then render ever-larger rectangles as you progress through the for loop.
The MIDlet constructor then creates your Canvas using
myCanvas = new MyCanvas();
As you can see, creating a Canvas is a relatively painless process. But it's a bit like a blank sheet of paperthe real fun is in drawing. That's where the Graphics class rips its pants off and jumps in the Jacuzzi.
Graphics
As you saw in the previous example, you use the Graphics class's tools to carry out basic 2D rendering on a Canvas.
Coordinates
Before you go much further, you really need to understand exactly which way is up in MIDP. The most basic thing is the position of the origin point on the display (also known as 0, 0). As you can see in Figure 5.22, from this point the X and Y mapping of the display should be very much what you're used to.
Figure 5.22. Graphics coordinates start at position (0, 0) in the top-left corner of the screen and progress along the X- and Y axes.
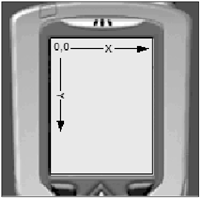
All of the draw methods you'll explore later in the chapter take coordinates according to this format. However, there are occasions when you might want to change the origin on the screen. In effect, you can change the world, and thus the position of everything, without changing where things are drawn in real X, Y coordinate terms. For example:
graphics.drawRect(25, 25, 10, 10 );
This code will result in a rectangle appearing at position (25, 25) and extending for 10 pixels in both directions. Now I'm going to change the nature of the universe itself and add an origin translation of 50 pixels on the Y-axis only.
graphics.translate(0, 50);
graphics.drawRect(25, 25, 10, 10 );
As you can see in Figure 5.23, the second rectangle is now drawn lower on the screen, at the (translated) coordinates (0+25, 50+25).
Figure 5.23. Using translate to shift the drawing origin.
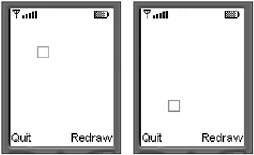
You should note that multiple calls to translate are cumulative for the same Canvas. Therefore, the following code will set a translation of (20, 70), not (20, 20):
graphics.translate(0, 50);
graphics.translate(20, 20);
You can also use negative numbers to adjust the translation. If you want to adjust the absolute position, you need to offset the translation by the current value. For example, if you want to clear any translation, you use:
graphics.translate(-graphics.getTranslateX(), -graphics.getTranslateY())
2D Drawing Tools
There is a host of simple drawing tools you can use to render onto a Canvas, including: lines, rectangles, and arcs. Let's start on the easy one first and draw a line.
The drawLine method takes four parametersthe X and Y coordinates of the line's starting position and the X and Y coordinates of the end of the line. For example:
graphics.drawLine(50, 0, 100, 0);
This code will draw a line from position (50, 0) to (100, 0). Unfortunately, I've waited for lunch in more attractive lines than this one, so why don't we spice it up a bit with some color and style?
You can change the current rendering color using the setColor method. Keep in mind this will change the color for everything rendered from that point forward. You can also change the line stroke using the setStroke method to change the style to DOTTED.(The default line stroke is SOLID.) For example, the following code will render a dashed line in bright red:
graphics.setStrokeStyle(Graphics.DOTTED);
graphics.setColor(255, 0, 0);
graphics.drawLine(50, 0, 50, 100);
Figure 5.24 shows the far more appealing result.
Figure 5.24. An example line drawn using the DOTTED line style.
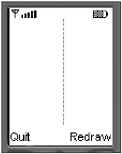
Drawing a rectangle is a very similar process, except that you need to specify things in terms of origin plus width and depth. You can also draw transparent or filled rectangles, and even give them rounded corners (for you Mac users).
The four rectangle methods are drawRect, drawRoundedRect, fillRect, and fillRoundedRect. I'll leave you to play around with the results from these. However, I think the arc drawing tools need a little explaining. First, take a look at one in action. The following code will create a red semicircle.
graphics.setColor(255, 0, 0);
graphics.drawArc(25, 25, 50, 50, 90, 180);
The output will appear similar to Figure 5.25.
Figure 5.25. An example of an arc drawn using the drawArc method.
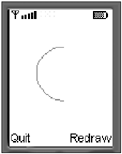
An arc is drawn using six parameters. The first four are the bounding box of the entire circle of the arc.
The other two parameters are startAngle and arcAngle. These relate to the portion of the circle that you want drawn, where an Angle is the number of degrees starting with 0 at right side (at three o'clock) and 180 on the left side (at nine o'clock). Figure 5.27 illustrates these angles.
Figure 5.26. The dimensions of an arc are described using six parameters.
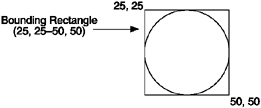
Figure 5.27. The directions represented by angles in the LCDUI.
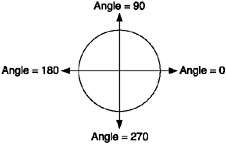
Drawing Text
You can draw text onto a Canvas using the methods drawChar, drawChars, drawString, and drawSubstring. The major modifier when drawing text is the font used. The font support included with MIDP is vastly simplified compared to typical GUIs. The Font class (you can see the API in Table 5.38) represents both a font and its corresponding metrics.
|
Method |
Description |
|---|---|
|
static Font getFont (int face, int style, int size) |
Gets a system font. |
|
Font getDefaultFont () |
Gets the default font. |
|
int getBaselinePosition () |
Returns the font's baseline. |
|
int getFace () |
Returns the face. |
|
int getHeight () |
Gets the font's pixel height. |
|
int getSize () |
Returns one of the SIZE constant values representing the font size. |
|
int getStyle () |
Returns one of the STYLE constant values representing the style in use. |
|
boolean isBold () |
Returns true if the font is bold. |
|
boolean isItalic () |
Returns true if the font is italics. |
|
boolean isPlain () |
Return true if none of the boys like this font. |
|
boolean isUnderlined () |
Returns true if the font is underlined. |
|
int charsWidth (char[] ch, int offset, int length) |
Gets the pixel width of a char array. |
|
int charWidth (char ch) |
Gets the pixel width of a single char. |
|
int stringWidth (String str) |
Gets the pixel width of a String. |
|
int substringWidth (java.lang.String str, int offset, int len) |
Gets the pixel width of a substring. |
To save resources, you don't get to create a Font object; it exists in the MID by default. You must acquire a reference to one in order to use it. The getFont method serves this purpose. For example, the following code gets a system font and then sets it to be the current font for all future text-drawing calls:
protected void paint(Graphics graphics)
{
   Font f = graphics.getFont(FACE_MONOSPACE, STYLE_BOLD, SIZE_MEDIUM);
   graphics.setFont(f);}
Notice the lack of a font name string or font size integer? This really brings home the point that you're just retrieving a standard font from the MID's rather limited library. Table 5.39 shows the full list of font types. (No, really …that's all you get.)
|
Method |
Description |
|---|---|
|
Font Faces (Mutually Exclusive) | |
|
FACE_MONOSPACE |
Produces monospaced characters. |
|
FACE_PROPORTIONAL |
Produces proportional characters. |
|
FACE_SYSTEM |
Produces default system characters. |
|
Font Sizes (Mutually Exclusive) | |
|
SIZE_LARGE |
Produces large characters. |
|
SIZE_MEDIUM |
Produces medium characters. |
|
SIZE_SMALL |
Produces small characters. |
|
Font Styles (Can Be Mixed) | |
|
STYLE_BOLD |
Produces bold characters. |
|
STYLE_ITALIC |
Produces italicized characters. |
|
STYLE_PLAIN |
Produces plain characters. |
|
STYLE_UNDERLINED |
Produces underlined characters. |
To draw using the current font, the most convenient method is drawString.For example, the following code will acquire the default font and then render a string in a rather pleasant shade of blue:
protected void paint(Graphics graphics)
{
   graphics.setColor(100, 100, 255);
   graphics.setFont(Font.getDefaultFont());
   graphics.drawString( "Default font", 0, 0, Graphics.TOP | Graphics.LEFT);
}
I'm using a shortcut here as well. Font.getDefaultFont() will get you the device's default font for display; typically this is a good one to use. Next you'll take this a little further and draw strings using three different font sizes.
protected void paint(Graphics graphics)
{
   graphics.setColor(100, 100, 255);

   int y = 0;
   graphics.setFont(Font.getDefaultFont());

   // draw the first string at position 0, 0
   graphics.drawString("Default font", 0, 0, Graphics.TOP | Graphics.LEFT);

   // move our y axis down by the height of the current font
   y += graphics.getFont().getHeight();

   // change to a SMALL size font
   graphics.setFont(Font.getFont(Font.FACE_SYSTEM, Font.STYLE_PLAIN,  Font.SIZE_SMALL));
   graphics.drawString("System, plain, small", 0, y, Graphics.TOP | Graphics.LEFT);
   // move our y axis down by the (now different) height of the current font
   y += graphics.getFont().getHeight();

   // change to a MEDIUM size font
   graphics.setFont(Font.getFont(Font.FACE_SYSTEM, Font.STYLE_PLAIN, Font.SIZE_MEDIUM));
   graphics.drawString("System, plain, medium", 0, y, Graphics.TOP | Graphics.LEFT);

   // move our y axis down by the (now different) height of the current font
   y += graphics.getFont().getHeight();

   // and finally change to a LARGE size font
   graphics.setFont(Font.getFont(Font.FACE_SYSTEM, Font.STYLE_PLAIN, Font.SIZE_LARGE));
   graphics.drawString("System, plain, large", 0, y, Graphics.TOP | Graphics.LEFT);
}
This code will produce the results shown in Figure 5.28.
Figure 5.28. An example of different fonts in use.
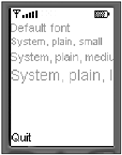
If you look carefully, you'll notice I'm maintaining a Y-axis variable to determine where the next line of text is drawn. This illustrates a good practice: Because you can't be sure of the implementation size of a given font, you should always deal in relative termsin this case by asking the font for its height. You can accomplish a similar task horizontally using the Font.getWidth method.
Now that you've seen some of the fonts in action, look a little closer at those drawString calls, particularly the last parameterthe anchor point. Table 5.40 lists the various anchor points available. As you can see, there are two distinct types horizontal and vertical. You must include one from each in any anchor you specify. For example, the following is not valid:
|
Type |
Description |
|---|---|
|
Horizontal Modifiers | |
|
HCENTER |
Horizontally centers the text |
|
LEFT |
Anchors text from the left |
|
RIGHT |
Anchors text from the right |
|
Vertical Modifiers | |
|
TOP |
Anchors text from the top |
|
BOTTOM |
Anchors text from the bottom |
|
BASELINE |
Anchors text from the baseline |
|
VCENTER |
Vertically centers the text |
// Warning: NOT a valid anchor point
graphics.drawString("Monkeys", 0, y, Graphics.LEFT);
Whereas the following is valid:
// OK, since both the X-axis and Y-axis anchor point modifiers are specified
graphics.drawString("Monkeys", 0, y, Graphics.LEFT | Graphics.TOP);
An anchor point's role is to adjust the origin of the text's bounding box. Therefore, when you specify an anchor point horizontally RIGHT, you are in fact moving the X origin all the way to the right of the text.
Images and Clipping
You've seen images used before, when you looked at the ImageItem class. Drawing images in a Canvas is even easier. Simply construct an image and use the drawImage methods to display it. For example:
try
{
   // Construct the image
   alienHeadImage = Image.createImage("/alienhead.png");
}
catch (IOException ioe)
{
   System.out.println("unable to load image");
}
…
protected void paint(Graphics graphics)
{
   graphics.drawImage(alienHeadImage, 0, 0, Graphics.LEFT|Graphics.TOP);
}
The image created in this example is immutablein other words, it's designed to stay static. The other type of image (mutable) allows modification at run time. You can use graphics tools to draw on a mutable image. That way, you can construct your own images for later use. Here's an example of a mutable image:
// construct a mutable image 50 x 50 pixels
Image i = Image.createImage(50, 50);
// use the image's graphics object to render a rectangle (note that I am NOT using the
Canvas. The Image object has its own graphics object that we can use to render onto the
actual image)
i.getGraphics().fillRect(0, 0, 49, 49);
// output the results to the canvas's grtaphics object
graphics.drawImage(i, 0, 0, Graphics.LEFT|Graphics.TOP);
The first thing you do is create an empty image with a width and height of 50 pixels. Then you do something strange: You ask the image for a graphics object! This illustrates an important concept. As you can see, you can use the image's own graphics object to draw the rectangle. You can then use that graphics object to scribble like a three-year-old.
The important concept here is that you're doing it away from the current display. This means that not only can you prepare things out of the user's sight, but you can also reuse them any time you want, thus saving the time to re-render the image.
Okay, I think you're ready for some serious action, so let's crank it up a gear. See if you can keep up with me.
// create a mutable image
Image i = Image.createImage(50, 50);

// get a reference to the image's graphics object
Graphics ig = i.getGraphics();

// set up some positions to make life easier
int centerX = i.getWidth()/2;
int centerY = i.getHeight()/2;

// draw our immutable image onto a mutable one
ig.drawImage(alienHeadImage, centerX, centerY, Graphics.VCENTER | Graphics.HCENTER);

// render two lines
ig.setColor(200, 0, 0);
ig.drawLine(0, 0, i.getWidth()-1, i.getHeight()-1);
ig.drawLine(i.getWidth()-1, 0, 0, i.getHeight()-1);

// get the font
Font f = Font.getFont(Font.FACE_PROPORTIONAL, Font.STYLE_BOLD, Font.SIZE_SMALL);
ig.setFont(f);

// render the text horizontally centered by adjusting the X starting
// draw position by half the string's width in pixels
String text1 = "Say NO to";
ig.drawString(text1, centerX - (f.stringWidth(text1)/2), 1,
               Graphics.LEFT | Graphics.TOP);
text1 = "Aliens";
ig.drawString(text1, centerX - (f.stringWidth(text1)/2), i.getHeight()-    f.getH
eight(), Graphics.LEFT | Graphics.TOP);

// ready! Send it to the canvas.
graphics.drawImage(i, 0, 0, Graphics.LEFT|Graphics.TOP);
Figure 5.29 illustrates the output from this code. (We're all ready for our anti-aliens demonstration.) In this example, the first thing you do is create your mutable image and set up some convenience variables, such as the location of the center of the image.
Figure 5.29. An example of an Image that we've drawn onto using its Graphics object.
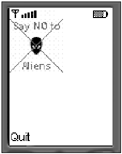
Next you do something you're going to find very useful in the futureyou turn that resource-loaded immutable image into a mutable one! It's easy to do; you just draw the image onto the mutable one. Once you have this, you go on to render two red lines over the top of the image and then the text.
Also notice the way you rendered the text. I wanted to center it horizontally on the image, so I adjusted the starting position by exactly half its pixel width using the Font.stringWidth method.
Before you move on, there's one last thing to cover with regard to drawing imagesclipping. Clipping lets you limit graphical output to only a certain area on the display. For example, if I were to set a clipping region starting at 10, 10 and extending to 50, 50, then from that point on, no graphics output would appear in any other part of the display.
To set a clipping region, you use the setClip method. For example, add the following clipping rectangle to the previous code:
// get a reference to the image's graphics object
Graphics imageGraphics = i.getGraphics();
imageGraphics.setClip(10, 10, 30, 30);
As illustrated in Figure 5.30, with this clipping region set, you'll find that much of the output from the previous example no longer appears.
Figure 5.30. An example of an image drawn with clipping bounds set.
You can also adjust the current clipping rectangle to create multiple clipping regions using the clipRect method.
Event Handling
As you've seen, you get input from user commands. However, this isn't a practical interface for moving a spaceship around the screen. The low-level UI provides the ability to capture direct key (and pointer) events that are automatically generated by the device.
I want to start with capturing and responding to key events. The setup in your MIDlet for this is surprisingly little. All you need to do is implement one or more of the key event notification methods: keyPressed, keyReleased, or keyRepeated. The MID will then call these methods when the input event occurs (in other words, when the key is pressed, released, or held down).
NOTE
Note
Some devices don't support repeating keys, so you might not see any calls to keyRepeated. To determine support for repeating keys, check the Boolean returned by the hasRepeatEvents method.
The key event notification methods include an integer representing the input key. Table 5.41 lists the constants that map these integers to keys on the devices. Notice something weird? I don't know about you, but the last time I looked, I couldn't find the Fire key on my mobile phone. The device-mapped keys (also known as action keys) are set by the MID on the most appropriate keypad options, as a convenience to us game programmers. (Aren't they nice?)
|
Key Event |
Description |
Key Event |
Description |
|---|---|---|---|
|
Default Keys |
Device Mapped Keys (Actions) | ||
|
KEY_NUM0 |
Numerical keypad 0 |
UP |
Up arrow |
|
KEY_NUM1 |
Numerical keypad 1 |
DOWN |
Down arrow |
|
KEY_NUM2 |
Numerical keypad 2 |
LEFT |
Left arrow |
|
KEY_NUM3 |
Numerical keypad 3 |
RIGHT |
Right arrow |
|
KEY_NUM4 |
Numerical keypad 4 |
FIRE A |
fire button |
|
KEY_NUM5 |
Numerical keypad 5 |
GAME_A |
Game function A |
|
KEY_NUM6 |
Numerical keypad 6 |
GAME_B |
Game function B |
|
KEY_NUM7 |
Numerical keypad 7 |
GAME_C |
Game function C |
|
KEY_NUM8 |
Numerical keypad 8 |
GAME_D |
Game function D |
|
KEY_NUM9 |
Numerical keypad 9 | ||
|
KEY_POUND |
# | ||
|
KEY_STAR |
* |
The convenience methods getKeyCode, getKeyName, and getGameAction let you retrieve the name of a key event or action, and vice versa. Take a look at keys in action:
import javax.microedition.midlet.*;
import javax.microedition.lcdui.*;

/**
 * A MIDlet demonstrating how to read and interpret key events from a device.
 * @author Martin J. Wells
 */
public class KeyEventTest extends MIDlet implements CommandListener
{
   private MyCanvas myCanvas;
   private Command quit;

   /**
    * A custom Canvas class we use to draw a string based on a screen
    * position modified by key events.
    */
   class MyCanvas extends Canvas
   {
      private String lastKeyName = "Hit a Key"; // name of the last key they hit
      private int x = 0; // current position
      private int y = 0;

      /**
       * Overriden Canvas.paint method that draws a string at the current
       * position (x, y).
       * @param graphics The graphics context for this Canvas
       */
      protected void paint(Graphics graphics)
      {
         // draw a black rectangle the size of the screen in order to wipe
         // all previous contents
         graphics.setColor(255, 255, 255);
         graphics.fillRect(0, 0, getWidth(), getHeight());

         // draw the string (the name of the last key that was hit)
         graphics.setColor(0, 0, 0);
         graphics.drawString(lastKeyName, x, y, Graphics.LEFT | Graphics.TOP);
      }

      /**
       * Overriden Canvas method called when a key is pressed on the MID. This
       * method sets the key name string and then modifies the position if a
       * directional key was hit.
       * @param keyCode the code of the key that was pressed
       */
      protected void keyPressed(int keyCode)
      {
         if (keyCode > 0)
            lastKeyName = getKeyName(keyCode);

         switch (getGameAction(keyCode))
         {
            case UP: y--; break;
            case DOWN: y++; break;
            case RIGHT: x++; break;
            case LEFT: x--; break;
         }

         // request a repaint of the canvas
         repaint();
      }
   }

   /**
    * MIDlet constructor that creates the custom canvas (MyCanvas) and adds
    * a quit command to it.
    */
   public KeyEventTest()
   {
      // Construct a the canvas
      myCanvas = new MyCanvas();

      // we still need a way to quit
      quit = new Command("Quit", Command.EXIT, 2);
      myCanvas.addCommand(quit);
      myCanvas.setCommandListener(this);
   }

   /**
    * Called by the Application Manager when the MIDlet is starting or resuming
    * after being paused. In this example it acquires the current Display object
    * and uses it to set the Form object created in the MIDlet constructor as
    * the active Screen to display.
    * @throws MIDletStateChangeException
    */
   protected void startApp() throws MIDletStateChangeException
   {
      // upon starting up we display the canvas
      Display.getDisplay(this).setCurrent(myCanvas);
   }

   /**
    * Called by the MID's Application Manager to pause the MIDlet. A good
    * example of this is when the user receives an incoming phone call whilst
    * playing your game. When they're done the Application Manager will call
    * startApp to resume. For this example we don't need to do anything.
    */
   protected void pauseApp()
   {
   }

   /**
    * Called by the MID's Application Manager when the MIDlet is about to
    * be destroyed (removed from memory). You should take this as an opportunity
    * to clear up any resources and save the game. For this example we don't
    * need to do anything.
    * @param unconditional if false you have the option of throwing a
    * MIDletStateChangeException to abort the destruction process.
    * @throws MIDletStateChangeException
    */
   protected void destroyApp(boolean unconditional) throws MIDletStateChangeException
   {
   }

   /**
    * The CommandListener interface method called when the user executes a
    * Command, in this case it can only be the quit command we created in the
    * constructor and added to the Canvas.
    * @param command
    * @param displayable
    */
   public void commandAction(Command command, Displayable displayable)
   {
      try
      {
         if (command == quit)
         {
            destroyApp(true);
            notifyDestroyed();
         }
      }
      catch (MIDletStateChangeException me)
      {
         System.out.println(me + " caught.");
      }
   }
}
This MIDlet displays a string (which changes when you hit different keys) and moves it around in response to you hitting the arrows keys on the device. The real action happens in the keyPressed method.
protected void keyPressed(int keyCode)
{
    if (keyCode > 0)
        lastKeyName = getKeyName(keyCode);

    switch(getGameAction(keyCode))
    {
       case UP: y--; break;
       case DOWN: y++; break;
       case RIGHT: x++; break;
       case LEFT: x--; break;
    }

    repaint();
}
Here you take the keyCode passed into the method and set the name of the key. You then check whether the key is one of the default action keys and change the positions of the x and y variables. Not as hard as it looks, is it?