Installing the Software
Now that you have downloaded the software, you can get started installing things. Along the way, I'll step through the configurations required to get everything working on your development system.
The first thing you should do is create a directory to contain everything you're doing. Use Windows Explorer or another appropriate tool to create a directory named j2me, for example:
c:\j2me
(You can choose another drive or path if it suits you.) From now on, I'll refer to this as the "j2me home."
Next you need to set up the Java development environment using the JDK before you move on to the MIDP.
NOTE
Tip
If you already have a working Java development environment of version 1.3 or later, feel free to skip steps as appropriate. Use the tests conducted at the end of the setup to make sure everything is ready to go before you continue.
Setting Up the JDK
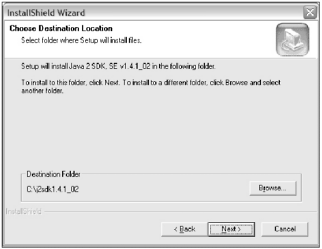
When you downloaded the JDK, you likely obtained a file with a name like j2sdk-1_4_1_XX-windows-i586.exe. Execute this program and install the JDK in the directory of your choice. I recommend sticking with the default location suggested by the installation software (see Figure 4.1).
Figure 4.1. Specify the directory where you want to install the JDK.
After the installation, the JDK will be pretty much ready to go; the only thing you might need to do is adjust your PATH environment variable to include the JDK binary directories. See the upcoming "Making Path Changes" section for details on doing this.
Setting Up the MIDP
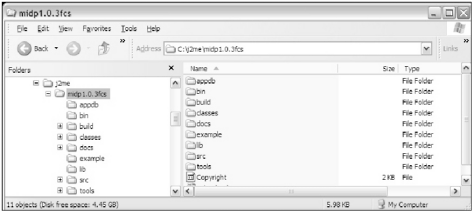
Next you need to install the MIDP. To do this, use your favorite compression tool to unpack the files into a subdirectory of the j2me home. You should end up with a directory something like c:\j2me\midp1.0.3fcs.
After you unpack the files, you will have a number of directories containing all the components of the MIDP package. You should see something like Figure 4.2.
Figure 4.2. After unpacking the MIDP files you should have a directory structure matching this.
Of these directories, Table 4.2 lists the ones of real interest to you at the moment.
|
Directory |
Description |
|---|---|
|
\bin |
Contains the command line tools, preverify.exe, and the midp.exe emulator. |
|
\classes |
Contains MIDP classes; you'll compile using these as a base. |
|
\docs |
Contains comprehensive documentation of the MIDP. Includes guides, reference materials, and release notes. |
|
\example |
Contains example JARs and JADs for demonstration purposes. |
|
\lib |
Contains configuration files. |
|
\src |
Contains example source code. |
Feel free to browse around these directories; the MIDP is a comprehensive package, and there's quite a bit to explore.
Making Path Changes
The PATH environment variable is used by operating systems as a list of directories it will search when trying to execute programs or libraries. A common use of the PATH is to specify directories that contain programs you want to execute, without having to navigate to the directory that contains it.
Operating systems define a few default directory locations, including the directory ".", which specifies the current directory. This is why you can change into a directory (CD) and then execute any program withinbecause the path contains the current directory (note that Windows does this transparently so you won't see a "." entry in the PATH).
Changing the PATH variable to include the MIDP bin directory makes working with the command line much easiersince you don't need to specify the full path of your executable every time you want to run a program. To do so, add the directories where executables reside to your PATH environment variable.
NOTE
Note
A command line (also known as a shell) is a method of interacting with an operating system that uses a simple text interface where you enter commands on a line. You can access a command line in Windows by selecting the Command Prompt program from the Accessories menu. For Unix you'll need to open a terminal window. Personally, I make a shortcut to this on my Quick Launch bar, and then adjust settings such as the number of lines and columns and the color scheme.
For example, to run the preverify program with the installation just discussed, you need to enter a command like this:
c:\j2me\midp1.0.3fcs\bin\preverify
However, if you add this directory to your executable path, you can then simply enter preverify. Because you have two directories (one containing the JDK executables and one containing the MIDP executables), adding them to your PATH will make your life twice as easy.
How you edit your PATH depends on your operating system version. For Windows XP, use the Control Panel to open the System panel, and then select the option to modify your environment variables (see Figure 4.3).
Figure 4.3. Edit the PATH system variable to add the MIDP executable path.
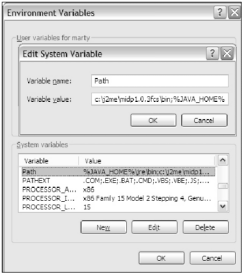
When you have the list of available system variables, select the PATH variable (you might need to scroll down) and hit Edit then type in all of your executable directories on to the end of the existing text. For example, add the following to the end of your path, preceded by a semicolon:
;c:\j2me\midp1.0.3fcs\bin;
Finally, you should also check and add the JDK binary directory to your path if it isn't already there. For example:
c:\j2sdk1.4.1_02\bin;
When you've finished editing the PATH and saving the new settings, you should open a new shell. This will cause the new PATH statement to take effect.
Setting MIDP_HOME
The MIDP executable requires you to set an environment variable named MIDP_HOME for the executable to function correctly. This is primarily so the program can access the various configuration files located in the lib directory of the MIDP installation.
Setting the variable is quite similar to adjusting the PATH. However, instead of editing the existing variable, you should create a new one. To do this, open the Environment Variables panel again, and then hit the New button and fill in the fields as shown in Figure 4.4.
Figure 4.4. Add a new environment variable named MIDP_HOME with the value corresponding to where you installed the MIDP RI.

Updating CLASSPATH
Like the operating system, Java has a similar system for locating classes when compiling and executing programs in the virtual machine. The CLASSPATH environment variable is just a list of all the directories which contain your installed class files and libraries. To compile and run your applications, you also need to adjust your Java CLASSPATHthe place where the Java compiler and run time (JVM) will look for classes.
At this stage, all you need to do is add the MIDP classes directory. You can do this by editing the CLASSPATH variable in the same way you edited the PATH variable. If you don't have an existing CLASSPATH variable just create a new one. Update it by adding the \classes path of your MIDP installation. For example:
c:\j2me\midp1.0.3fcs\classes;
I also recommend you add the current working directory (specified as a single) to your CLASSPATH. This adds the convenience of allowing you to place class files into the directory with which you're working. The end result is that you can just change into a directory that houses your program class files and run them directly from therekeep in mind that a "."on your path translates to whatever directory you are currently in. This saves you from having to add that directory to your CLASSPATH or having to copy the class files into a directory already contained within your CLASSPATH.
Including the JDK library path, a complete CLASSPATH environment variable generally will look like the following line. (Don't miss that "." at the end!)
CLASSPATH=c:\j2sdk1.4.1_02\lib;c:\j2me\midp1.0.3fcs\classes;.
NOTE
Tip
To check the value of your CLASSPATH, you can enter set in the command line. This will show the current values of all environment variables. Don't forget that changes to system variables made through the Control Panel won't take effect until you open a new command line.
Testing the Setup
Now that you've installed the JDK and MIDP, you should test things to make sure you're really ready to go.
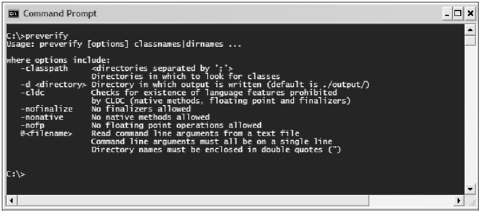
Grab a shell and type preverify. The results should match those shown in Figure 4.5.
Figure 4.5. Output from the preverify command.
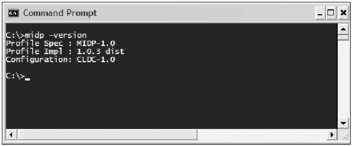
Next you need to make sure the MIDP emulator is available. Enter midp -version in the shell. The results should look like Figure 4.6.
Figure 4.6. The results from entering the midp -version command in a shell.
